
How to Grow Mint in Pots: The Complete Beginner’s Guide
The quick answer
Mint is one of the easiest, most generous herbs you can grow — almost impossible to kill and happy to multiply itself for free. There’s really only one rule you must follow: grow it in a pot, never loose in a bed, because in open ground it spreads aggressively and is hard to remove. Give it a roomy container, free-draining compost, a bright spot, and soil kept lightly moist, and it will reward you all season for years.
The other thing worth knowing before you start: “mint” isn’t one plant. Spearmint, peppermint, apple mint and more all grow the same way, but they taste quite different — and a few plants sold loosely as “mint” (like pennyroyal) need more care than the rest. I’ll cover all of that below.
If mint is the first herb you’re growing, you’ve chosen well. Here’s everything you need.
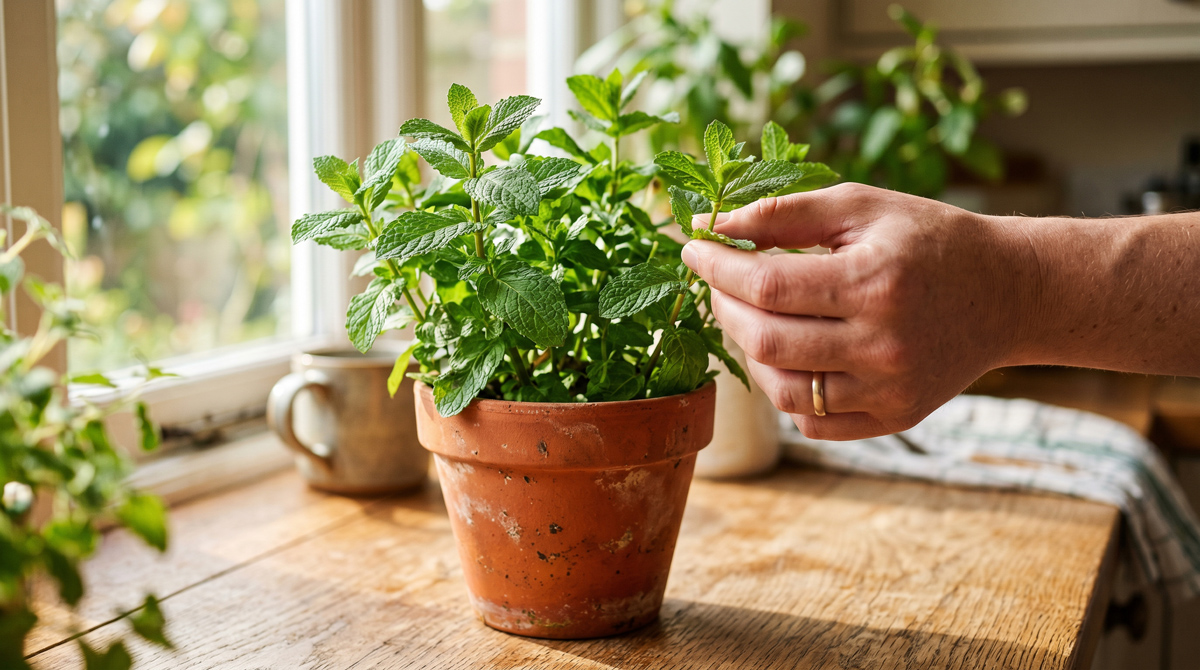
Why mint is the perfect beginner herb
I always point nervous first-time growers at mint, and I mean it. Here’s why it’s so forgiving:
- It wants to grow. Mint is vigorous to a fault — your job is mostly to keep up with it, not coax it along.
- It bounces back. Cut it hard, miss a watering, knock it about — it forgives almost everything.
- It propagates itself for nothing. A single sprig in a glass of water roots in a couple of weeks. One pot becomes five.
- You actually use it. Unlike a herb you snip once a month, mint earns its windowsill space — tea, salads, sauces, drinks, all summer.
The only thing to respect is the flip side of that vigour: its urge to spread. Contain that in a pot and mint is pure upside.
The golden rule: always grow mint in a container
This is the one mistake to avoid, so let me be blunt about it: don’t plant mint in open ground unless you genuinely want it to take over.
Mint spreads by runners — stems that creep along and just under the soil, rooting as they go — and by underground rhizomes that send up new plants a surprising distance from the parent. In a bed, one plant becomes a colony in a season or two, and digging it out fully is genuinely difficult because any scrap of root left behind resprouts.
Mint also has a mild allelopathic streak: its roots and decaying leaves release compounds that can suppress some neighbouring plants. So it’s a poor team player in a mixed herb bed.
A pot solves all of this at a stroke — it contains the roots, keeps the plant where you want it, and mint genuinely thrives in a container anyway. If you absolutely must put it in the ground, sink a bottomless bucket or a deep root barrier into the soil to fence it in, and still expect to police the runners that escape over the top.
Never plant two different mints in the same pot. They compete, and you’ll lose the weaker one. One mint, one pot.
Choosing and buying your mint
A few pointers for getting off to a good start:
- Buy a plant, not seed. Mint seed is unreliable — it comes up variable (you may not get the plant pictured) and some mints are sterile. A young plant or a cutting gives you exactly what you want, faster.
- Pick a healthy specimen: perky, evenly green leaves, no orange spotting underneath (that’s rust — skip it), no clouds of tiny flies around the pot, and roots that aren’t a solid wound-up mass at the drainage holes.
- Know what you’re buying. Common mint names are a muddle, and labels aren’t always accurate. If you want a mint for the kitchen, spearmint is the safe, all-purpose choice. If your label uses a regional name you’re unsure of — or names a plant like pennyroyal — check what it actually is before you cook with it (I’ve a full guide on that, linked below).
Potting it up, step by step
- Choose a roomy pot with drainage holes — at least 20–25 cm (8–10 inches) across, deeper rather than shallow. Mint’s roots fill a pot fast, so bigger is better and dries out more slowly, which suits its thirst.
- Use free-draining, peat-free multipurpose compost. Mint isn’t fussy about soil type but wants decent drainage; avoid heavy, claggy mixes that stay sodden.
- Plant at the same depth it sat in its nursery pot. Firm it in gently.
- Water it in well to settle the soil around the roots.
- Stand it somewhere bright (see below).
- Start pinching it early to build a bushy shape from day one.
Light, water and feeding
Light. Mint is happy in full sun to partial shade. On a bright windowsill, balcony or patio it thrives. More sun usually means a stronger scent and flavour, so don’t bury it in deep shade. In a fierce Mediterranean summer (I grow in Rome, so I see plenty of that), a little afternoon shade stops the leaves scorching and the pot baking dry.
Water — the skill that matters most. Mint likes soil that stays lightly and consistently moist; by nature it’s a plant of damp ground. But it hates sitting waterlogged. In high summer I water mine roughly daily; in cool weather, far less. The test: push a finger 2–3 cm (about an inch) into the soil — dry at that depth, water it; still damp, leave it. Always tip away water collecting in the saucer so the roots aren’t standing in it.
A useful distinction: underwatering wilts mint dramatically but it usually recovers within hours of a drink. Chronic overwatering quietly rots the roots from below — slower to spot, harder to fix — so when in doubt, let the top inch dry before you water again.
Feeding. Mint is so vigorous it rarely needs much. A weak general-purpose feed every few weeks through peak summer is plenty. Don’t overdo it — too much nitrogen gives floppy growth and weaker, less aromatic leaves, not better ones.
Harvesting so your mint gets bushier, not balder
This is the single most useful habit to learn, because most beginners get it wrong.
The mistake is picking the biggest individual leaves off here and there, which leaves bare stems and a thinning plant.
Do this instead: pinch out the growing tips. Cut the whole top of a sprig just above a pair of healthy leaves. That one cut tells the plant to push two new shoots from that point — so it branches and branches, getting fuller, denser and more productive all season.
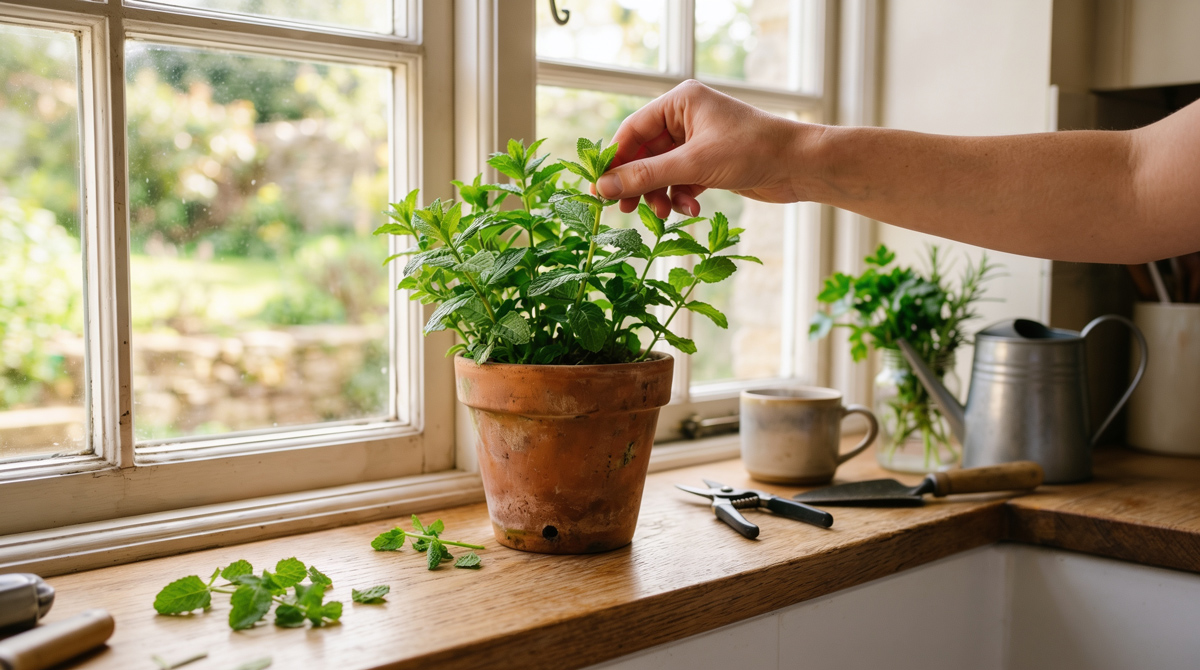
The rules:
- Start while the plant is young to build a bushy shape early.
- Harvest in the morning, when leaves are freshest and most aromatic.
- Never take more than about a third at once — leave it enough to power back.
- Use sharp, clean snips for a cut that heals fast.
Every harvest doubles as a prune, keeping the plant compact and discouraging it from running to flower.
Propagation: mint’s superpower
Mint is, hands down, the easiest herb in the world to multiply — and a brilliant first propagation project. Three ways:
1. Cuttings in water (the magic trick).
- Cut a healthy sprig 8–10 cm (3–4 inches) long, just below a leaf joint.
- Strip the lower leaves so the bottom couple of centimetres of stem is bare.
- Stand it in a glass of water on a bright sill, out of scorching sun.
- Change the water every couple of days.
- Roots appear within one to two weeks. Once they’re a few centimetres long, pot it up, keep it moist for a week or two while it settles — done.
2. Division. Every year or two, tip the whole plant out, pull or cut the rootball into chunks, and replant a healthy piece into fresh compost. New plants and a rejuvenated parent.
3. Runners. Any creeping stem that has rooted where it touched soil can be snipped off and potted up as a ready-made plant.
Skip seed for mint — it’s the unreliable route. Cuttings give you an exact copy of the plant you like, in a fortnight, for nothing.
Overwintering and keeping it for years
Mint is a hardy perennial, so the same plant rewards you season after season — how it behaves over winter depends on your climate:
- Mild winters (like mine in Rome): it may keep going quietly or only half-die-back. Just ease off the watering.
- Cold winters (my earlier experience growing in Belgium): the top growth dies back completely to the roots. This is normal — don’t bin the pot. Trim the dead growth, protect the pot from the hardest freezes if you can, water sparingly, and fresh shoots push up once the soil warms in spring.
- Refresh every year or two by dividing and repotting into fresh compost, so the pot doesn’t become an exhausted, solid mass of roots.
A tour of mints worth growing
Once you’re hooked, there’s a whole world beyond your first pot. They all grow the same way and all need a container — they just taste different:
- Spearmint (Mentha spicata) — the all-rounder; best for general cooking, sauces and drinks. If you grow one mint, grow this.
- Peppermint (Mentha × piperita) — a natural cross of water mint and spearmint; strong and menthol-rich. Best for tea and sweet things, less so for savoury cooking.
- Moroccan mint (a spearmint type) — the clean, classic mint for a proper mint tea.
- Apple mint (Mentha suaveolens) — soft, fuzzy, fruity leaves; gentle and lovely in fruit dishes.
- Chocolate mint (a peppermint type) — a fun novelty with a faint cocoa note, good with puddings.
- Pineapple mint (variegated apple mint) — cream-edged leaves, more ornamental than culinary.
- Mojito mint is a popular choice for pots, with its own quirks when it comes to telling it apart from look-alikes — I cover the details in my full guide.
There are also a few plants sold loosely under “mint” names that are not everyday culinary mints — pennyroyal (Mentha pulegium) is the main one to know about, because it needs real care in the kitchen. If your plant carries a regional name like “menta romana,” it’s worth confirming exactly what it is.
Which mint have I got — and is it safe to eat? That’s a whole topic in itself, especially around pennyroyal. I’ve covered identification and safety in detail in a companion guide — see Menta Romana: Is It Pennyroyal, and Is It Safe to Eat? linked below.
Not sure what you’ve actually bought? I ran into exactly this with a pot labelled “menta romana” — here’s how I worked out what it was, and how to be sure yours is safe to eat.
Common problems and quick fixes
- Tall, leggy and bare at the base → too little light or too little harvesting. Move it brighter and cut it back hard; it resprouts bushier.
- Trying to flower → leaves turn smaller and less aromatic once a stem blooms. Pinch off flower buds for the best foliage, or let a few flower for the bees.
- Wilting or yellowing → check water both ways. Bone-dry soil wilts it; a soggy, waterlogged pot yellows the lower leaves and rots roots. Aim for “lightly moist” with good drainage.
- Orange-brown spots/pustules under the leaves → mint rust, the one disease mint is prone to. Remove and bin (don’t compost) affected leaves, improve airflow, avoid wetting the foliage, and in a bad case cut the whole plant back hard to clean new growth. Don’t move infected material near other mints.
- Tiny flies around the soil → likely fungus gnats from compost kept too wet. Let the top of the soil dry out more between waterings. (Full guide linked below.)
- Sticky leaves or clusters of small insects → aphids. Rinse them off, squash them, or use a gentle insecticidal soap; keep the plant healthy and airy.
- Growth stalled, roots filling the pot → it’s root-bound. Pot up a size, or divide and replant a fresh piece.
Using and storing your mint
For everyday culinary mints (spearmint, peppermint, apple mint, Moroccan mint), enjoy freely:
- Fresh: in salads, with peas and new potatoes, in yoghurt and raita, in tea, sauces and cold drinks. Add it near the end of cooking — its aromatics are delicate and fade with long heat.
- Dried: hang small bunches somewhere warm and airy, or strip and dry the leaves flat, then store in an airtight jar away from light.
- Frozen: chop and freeze in ice-cube trays topped with water — handy little flavour bombs for drinks and sauces.
(If your plant is pennyroyal, keep it out of everyday cooking — see the companion safety guide.)
The kit I’d actually bother with
Mint needs very little — that’s part of its charm:
- A roomy pot (20–25 cm / 8–10 inches or bigger) with drainage holes.
- A bag of peat-free multipurpose compost.
- Sharp herb snips for clean cuts when harvesting and propagating.
- A saucer to protect your sill — just empty it after watering.
No grow light needed on a bright windowsill, no special feed, no fuss.
Honesty note: some links above may be affiliate links, meaning I earn a small commission if you buy through them at no extra cost to you. I only recommend simple, genuinely useful kit I’d use myself.
The bottom line
Mint is the herb that gives back more than you put in. Grow it in a pot to keep it in its place, keep the soil lightly moist, pinch the tips for a bushy plant, and root cuttings in water for an endless free supply. Get those four things right and you’ll have fresh mint on tap for years — and one pot’s worth of plants to give away.
Over to you: which mint are you growing — or trying to identify? Tell me in the comments. If you’re not sure what you’ve got, describe the smell, the leaves and the stem and I’ll help you work it out.
Keep growing (links to more interesting stuff)
- Menta Romana: Is It Pennyroyal, and Is It Safe to Eat? — identify your mint and check it’s safe (the companion to this guide).
- Start your Herb Garden with Spearmint — a deeper dive on the best all-purpose culinary mint.
- Growing Basil hub — another great beginner herb to grow alongside.
- Rooting Basil Cuttings — the same water-propagation trick applied to basil.
- How to avoid Fungus Gnats — for tiny flies in a too-wet pot.
- Best potting mix / soil for herbs — supports the potting and watering sections.
FAQ
How do you grow mint in a pot? Use a roomy pot (20–25 cm / 8–10 inches) with drainage holes and free-draining compost, stand it somewhere bright in sun to partial shade, and keep the soil lightly but consistently moist — never waterlogged. Pinch out the growing tips regularly to keep it bushy.
Why should mint be grown in a container? Mint spreads aggressively by underground runners and rhizomes and is hard to remove once established in a bed. A pot contains the roots, keeps it where you want it, and mint thrives in containers anyway.
How often should I water mint? Keep the soil lightly and consistently moist. In high summer that can mean daily; in cool weather, much less. Push a finger an inch into the soil — water if it’s dry at that depth, leave it if still damp. Never let the pot stand in water.
How do I grow mint from a cutting? Stand an 8–10 cm sprig in a glass of water on a bright windowsill, change the water every couple of days, and roots appear within one to two weeks. Then pot it up.
Does mint come back every year? Yes — mint is a hardy perennial. In cold climates the top growth dies back in winter and resprouts from the roots in spring; in mild climates it may barely pause. Keep the same pot going for years.
Why is my mint leggy and bare at the bottom? Usually too little light or not enough harvesting. Move it somewhere brighter and cut it back hard, then pinch the growing tips regularly to keep it bushy.
What are the orange spots under my mint leaves? That’s mint rust, a fungal disease. Remove and bin affected leaves (don’t compost them), improve airflow, avoid wetting the foliage, and cut the plant back hard in a bad case.
Which mint is best for cooking? Spearmint (Mentha spicata) is the best all-purpose culinary mint. Peppermint is stronger and better for tea and sweet dishes. Some plants sold as “mint,” like pennyroyal, are not everyday culinary mints — check what you have.
Leave a Reply
Want to join the discussion?Feel free to contribute!