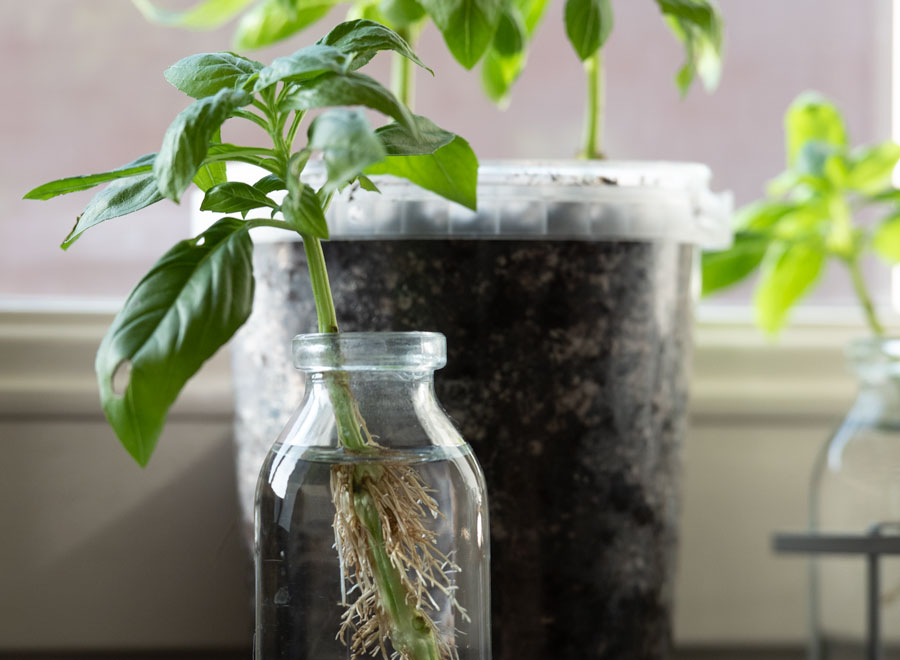
ROOTING BASIL CUTTINGS
My complete guide – All Questions Answered
“Rooting Basil Cuttings is one of the easiest ways to propagate basil, once you get the hang of it.” – Master Herb Gardener Kurtie.
My own journey as an herb gardener started by rooting basil cuttings into full blown harvesting plants, and I enjoyed every part of it.
That is why I want to share with all new and enthusiastic herb gardeners all the things I have learned, all the mistakes I’ve made and the successes I had with rooting basil cuttings.
I want this article to become a Basil Propagation and Information Page, that tries to have all questions answered, to become the go-to internet source for all beginning and experienced herb gardeners.
I’ve found about 33 frequently asked questions on internet forums and social media about basil propagation from rooting basil cuttings. I have tried to answer the most relevant ones below.
So welcome to my complete two-part propagation guide on Rooting Basil Cuttings and let’s try to teach you how to get a constant flow of delicious tasty basil leaves.
Part One : A practical step-by-step guide, with detailed instructions and pictures, to show you how to take basil cuttings, grow new basil plants and make you a basil cutting expert.
Part Two : An extensive Frequently Asked Questions, providing answers to all the “why, how, when and where” questions you may have.
Step-by Step Guide – How to take basil cuttings and grow new plants
Step 1 – Take cuttings from a healthy plant (not flowering)
From one of my mature basil plants, I select a stem that doesn’t have any seed stock or a crown and that is at least three to four inches (10 cm) long.
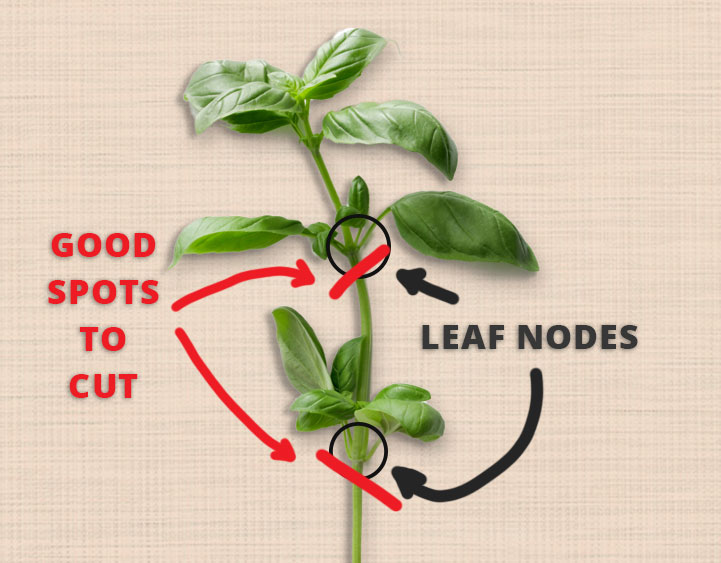
Next I will identify a good location where I will take the cutting from the basil plant.
With a pair of scissors, I carefully cut the stem at an angle of 45 degrees just (about a quarter of an inch or a half centimeter) just below a leaf node with a clean sharp knife or scissors. If you leave a part of the stem below the leaf node, it often start rotting, what has a negative influence on the plant and the water.
Don’t make your cuttings to long either, because in my experience extra long cuttings won’t root well or, if they root, you will get a long tall plant instead of a beautiful bushy one.
I will always take a couple of cuttings, just to make sure that I will always have a couple of them rooting.
Step 2 – Remove the lower leaves from the stem
Now that I have a nice cutting, I will remove all the leaves from the stem except the top two sets of leaves.
When I say remove, I mean that I will pinch off the leaves with my fingers or sometimes a pair of scissors. Removing these leaves allow the cutting to focus its energy only on the root generation and not on leave development. Any part of the cutting that will be below the surface of the water should be free of leaves. If you don’t remove theses leaves, they will rot and make your water become dirty very quickly.
Also pay attention to be gentle with the stems. Don’t cut or damage the stems when you’re removing leaves. I have had several cuttings not rooting because the stem was “broken” in the process.
Step 3 – Put cutting in water
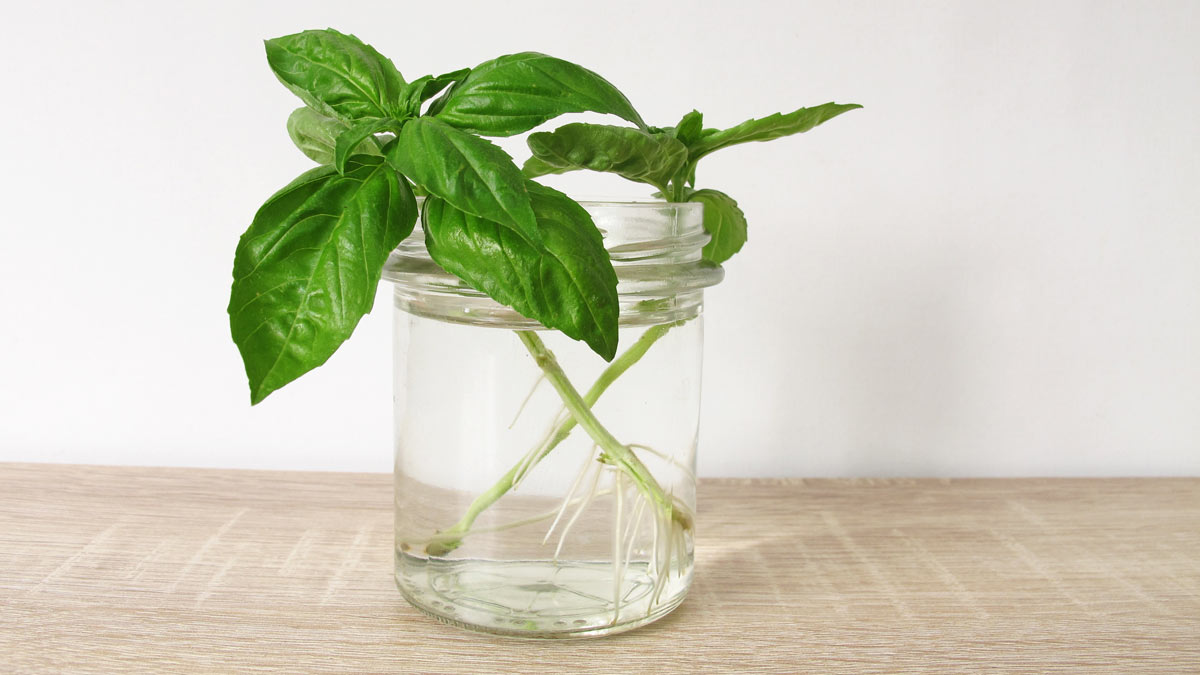
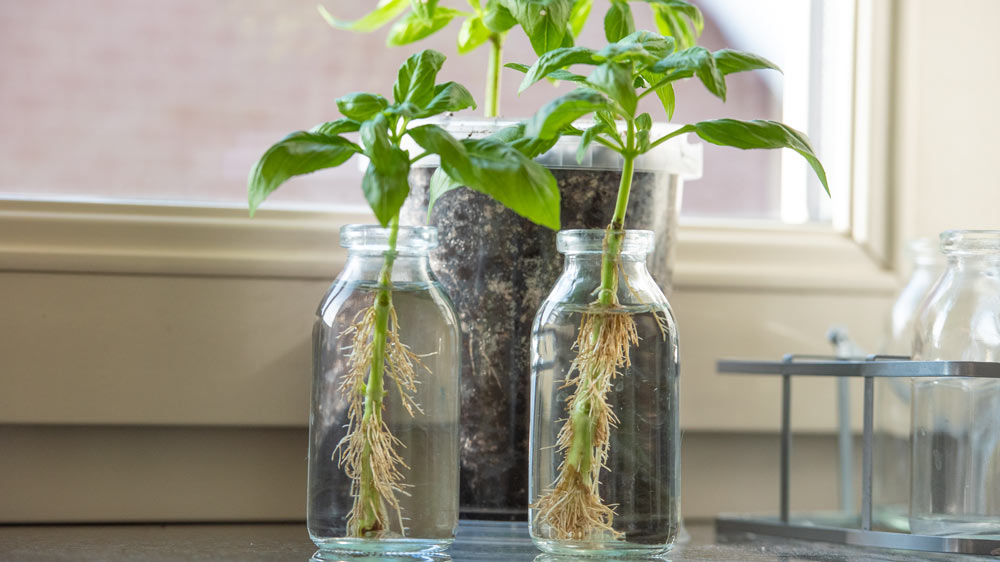
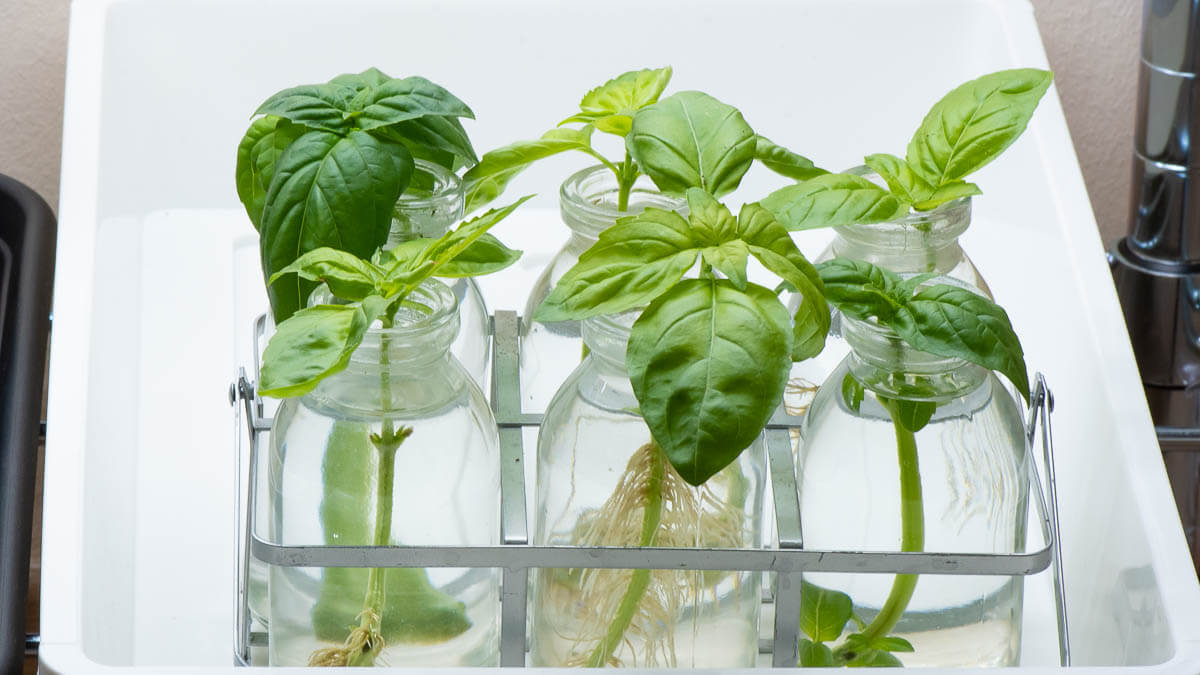
The next step is to put the stem into water, making sure that the leaf nodes are under water. The rooting can start.
I use little glass bottles to put the cuttings in because this makes it easy to check the development of the roots. But really, you can choose just about any jar or water-proof container, pot or bottle will work just fine. A small plastic drinking bottle, for example, will do just fine too.
I usually prefer bottles over pots because bottles make it easy to put the cuttings straight up.
The lower leaves can easily find support on the edge of the bottle. But really, just about any jar or water-proof container will work.
I think it is also a plus to have the top leaves out of the bottle, so that they have access to a fresh airflow all the time.
Step 4 – Position the cuttings on a warm bright spot
Now that the cutting is in a bottle with water, I put the cuttings on an unused spot at the windowsill.
Light is life for plants, so I want to pick a really bright spot on a window sill. The window sill at my kitchen has bright indirect sunlight most of the day, so that works great. Basil prefers a comfortable warm spot.
Some sources advise to not choose a spot in full sun, but I haven’t experienced negative consequences by doing so yet.
Step 5 – Switch water every two to three days
Switching the water in the bottles with fresh room temperature water is essential for successful and healthy root grow root of the cuttings.
Normally I switch the water every day to prevent the growth of algae and bacteria.
Every day is good, but I make sure to do it at least every two or three days. I don’t add fertiliser of any kind.
When I change out the water form the bottles, I always give the roots a little rinse while rubbing the roots gently with my fingers. I do this to remove the mucky film from the roots before placing them in the new water.
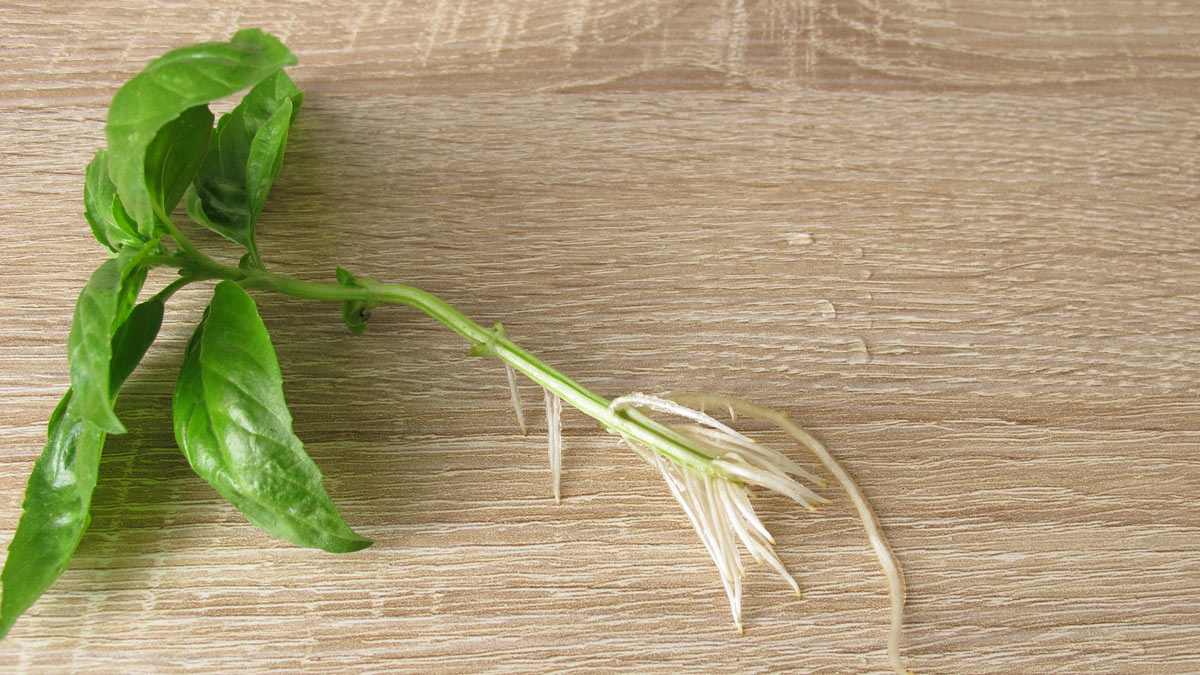
Step 6 – Roots will start growing after 1 week
Now it is time to watch the roots grow! After two to three weeks, the basil cutting should have grown a real set of roots of about 2 inches long (5 cm).
When the roots are about that size, I know that the basil cuttings are ready to plant in soil. It is important to wait until there is a sufficient quantity of roots because when transferring from water to soil, some roots will die in this transition.
Step 7 – Replant the fresh young plant in soil
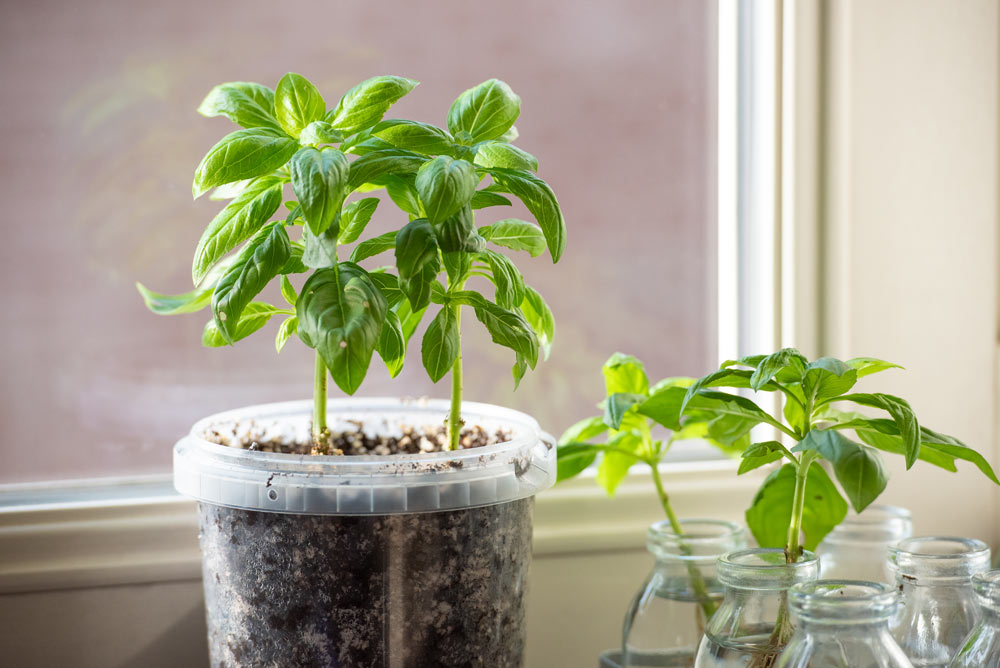
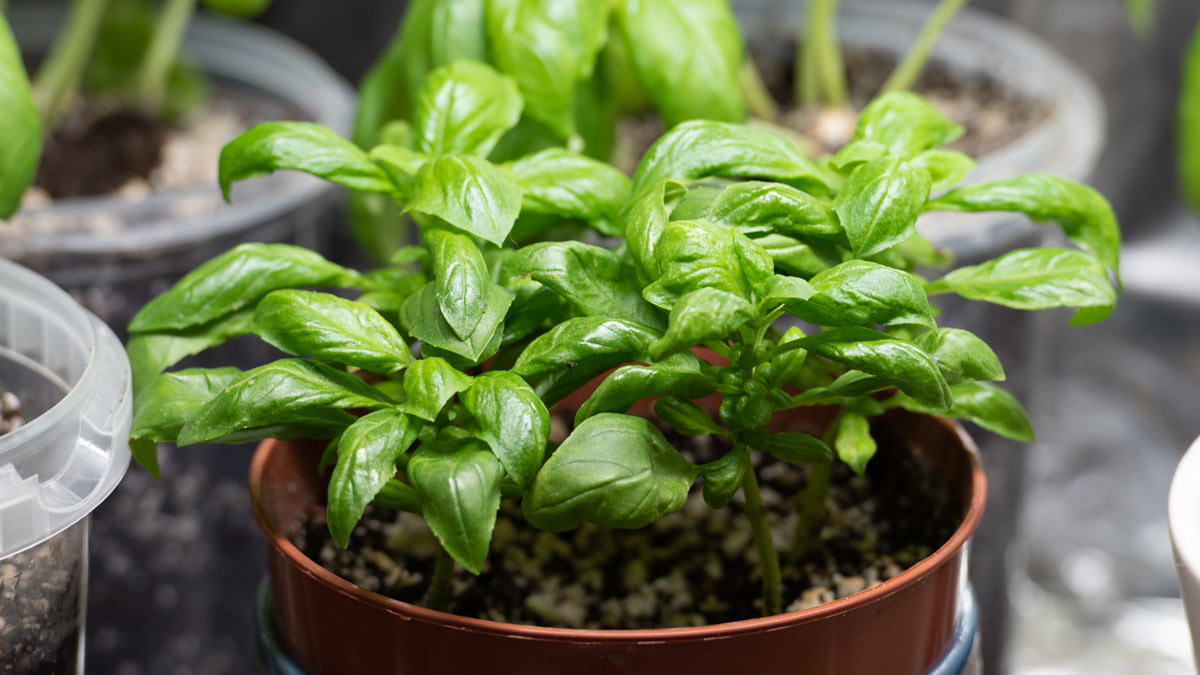
This part is very easy. It is just as simple as putting the rooted cuttings into a pot with soil or directly into the ground, covering with soil to above the root level.
Make sure that they have enough water the first couple of days to adjust to the new growing medium. So don’t let them dry out.
Here is the link to the article about my potting soil mix, I use for transferring rooted basil cuttings into soil and pots : My Potting Soil Mix for Herbs
Ok now it’s up to you to follow these easy steps. I will add more pictures and probably a time laps video too. Share your success with this methode in the comments below! And show us some pictures too.
Frequently Asked Questions about rooting basil cuttings
What equipment is needed for propagating and rooting basil cuttings?
The good news is that you don’t need much at all to propagate cuttings. All you need is:
- a pair of scissors (which most people have just like me in the kitchen drawer)
- a couple of glass bottles, pots or glass jars (I have them from food jars)
- water (which we all have)
- a good mix of potting soil for transferring the fresh plants to soil.
So propagating this way is basically free.
How and where to take cuttings from a basil plant without killing the plant?
We have explained in the Information guide about basil that harvesting and pruning is required to make our basil grow more bushy. So the moment we need to prune a basil plant is ideal for also taking new cuttings.
It is not wise at all to cut or harvest all the leaves off one plant at once, because your plant will probably die. The plant needs the leaves to capture the sunlight and to keep photosynthesis going, necessary for life.
I cut maximum roughly about 1/3 of the plant in one time. This way the basil can grow back more bushy and stay beautiful to look at. I always use a pair of scissors to make clean cuts and to avoid bruising the stems because this will cause rot. I will always cut under an angle of 45 degrees, as shown in the picture of step 1 above, this way we get a larger surface for roots to grow from. Roots will form usually at the cut and at the nodes.
Why and how frequently do we need to change water?
The water in the bottles or pots will get filthy after a couple of days, leaving a mucky film on the roots. The roots will turn brown and will start rotting.
Just as most common house plants also basil can be propagated by the classic water propagation method. I use (not cold) tapwater at room temperature for rooting my basil cuttings.
How long does rooting basil cuttings take?
After a week, I usually start to see the first signs of fresh new roots. And after two to three weeks, the roots are long enough to think about replanting the cutting into soil.
How long does it take basil to grow?
The growth and the speed of growth of the basil plant depends of course on the growing circumstances: light quantity and quality, temperature,…
The better the circumstances the faster a basil plant will grow.
I am working on a time-lapse movie to show the growing speed of the basil plant, it will be published very soon.very soon.
Why cut flowers off my basil plant?
Whether you need to cut the flower or flower buds off the basil plant, depends on the reason why you are growing basil plants.
Basil is an annual plant. this means that during its life time cycle of one year, it will grow from seed, it will bloom (flower), produce seeds and afterwards it will finally die.
A basil plant that has flowered will stop growing leaves and will start producing seeds. So if you are growing the basil plant to harvest leaves, it is smart to cut away the flower crown when it is forming. This way the plant will continu to form leaves, because it has not yet received the signal to start producing seeds.
After seed production the plant will die off too. This means that cutting the flower crowns you will prolong the life of the basil plant.
Why are you rooting basil cuttings to grow new plants?
First of all it is easy and fun to do.
It is so rewarding to grow things and so cool to get results! I get a great sense of satisfaction when I see a new fresh plant growing from a stem cutting, sprouting healthy roots and watch it develop into a healthy adult basil plant.
This process is very educative for kids too.
Why is it best to cut the stem just below the leaf node?
Maybe it is a good thing to start with explaining exactly what a leaf node is, because it is important that you are able to recognise them. A node is the place on the stem where the basil leaves and fresh shoots grow. A node on a stem looks a little bit swollen, thicker than the stem itself, and it is the spot where the leaves are attached to the stem. When you cut or pinch the leaves from the stem you can easily count the different nodes on the stem.
When propagating basil form cuttings, it is indeed important to cut immediately below a node for successful rooting, because it is from these little bumps on the stem, from the leaf node area, in first instance that new roots will be formed.
How long will a basil plant live?
Basil is an annual plant which means that during its life time cycle of one year, it will grow from seed, it will bloom (flower), produce seeds and afterwards it will finally die.
How long should the stem ideally be for rooting basil cuttings?
The primary spot where roots will sprout is from the leave nodes. That is why I usually take a cutting with at least 2 nodes below the leaves as it increases the total amount of roots. It is of course a personal preference. I have grown cuttings from a stem with just one leaf node too. It is not exact science.
How long do we have to wait before transferring the rooted cutting into soil?
Once the roots on my basil cuttings are about 2 inches (5 cm) or longer, I am considering to transfer the cutting into a pot indoors. This again, isn’t exact science because some people even skip the water phase and stick the cuttings immediately into soil. Let me know what works for you in the comments below.
Can we wait too long before transferring basil cuttings to soil?
Interesting question. Some people keep growing their basil in water and never transplant the cutting. As long as you refresh the water regularly, this can work.
Why are my basil cuttings not rooting at all?
If none of your cuttings are rooting at all, check if you have followed the 7 steps from our step-by step method above. Basil will root in water very easily, so I am sure you will get successful next time if you follow our guide.
I see a few possible causes of not being successful right away : you may have made a cut at the wrong place, not refreshed the water, not the right room temperature, not the right water temperature…
But even then roots can grow in minor circumstances. So adjust and try it again.
Why is the stem turning brown and rotting?
The brown colour usually are the first signs of stem rot. This very often starts at the cut end. Refresh the water more often to prevent continued rotting of the stem, and gently rub off the trotted parts of the stem, while rinsing the stem under running water.
Should I place a plastic bag over the basil plant when rooting cuttings?
I have seen pictures where some herb gardeners cover the basil cuttings with a clear plastic bag after planting them into a soil mix. The plastic bag creates a sort of a green house effect, providing a nice humid environment and slow moisture loss helps the stem to continue to root and the plant to grow.
I have done this in the past with certain plants, but I have never done this so far with herbs, but I sure recognise the benefits of it.
My basil cutting is dying after transferring it into soil
This is indeed a common problem that has been mentioned by multiple herb gardeners. I see two possible issues here: the wrong soil mix or roots bruised or damaged in the planting process
The wrong soil mix
Very often the basil cutting will die off when it is transplanted in a soil mix that is cloggy, not well drained. Take a look at the soil mix I am using for all of my herbs.
Damaged roots
Remember that the roots of the basil cutting and also the smaller root hairs, which are what actually absorb water and nutrients, are very fragile. I pay special attention to not damage them when transferring the cutting into the potting soil. How? I start with putting some soil mix in the bottom of the pot. Next I will hold the cutting upright and fill the rest of the pot with soil mix, by sprinkling the soil into the pot with my fingers.
What yo don’t want to do is press the soil hard into the pot and around the plant! Next I will add water to let the soil settle in the pot and to get the roots and roots hairs in contact with water and soil. I will let the water drain through the holes in the bottom and then I will not start filling up the sink holes by pushing on the soil (like many of us are doing).
With this method I don’t need to water the planted basil for quite a while, since the pot is starting off well watered and moist. The benefit is that this is the same condition that the rooted cutting was in when it was growing in water with no soil. So I believe this helps to avoid to minimise the transfer shock to the plant.
Join the community
If you are looking to grow an amazing herb garden, I strongly recommend signing up to our community and gain access to our FREE downloads and regular updates. We want to ensure your success by sharing our tips and tricks with you for growing herbs.
Leave us a comment
If, after reading the information above, you still have a question that remains unanswered, then let me know by mail or in the comments below.

