
DIY Tiered Herb Garden Shelf from Cinder Blocks
I Built a Tiered Herb Garden Shelf From Cinder Blocks — Staggered by Sunlight, Not Just for Looks
If you’ve got a terrace, patio or balcony where potted herbs end up crowded on the floor, this is the shelf that fixed it for me — three tiers, built from cinder blocks and stained timber, for about [€X]. But the bit I actually want to show you isn’t the stacking. It’s why it’s staggered the way it is, and why I didn’t just paint it whatever colour was going spare.
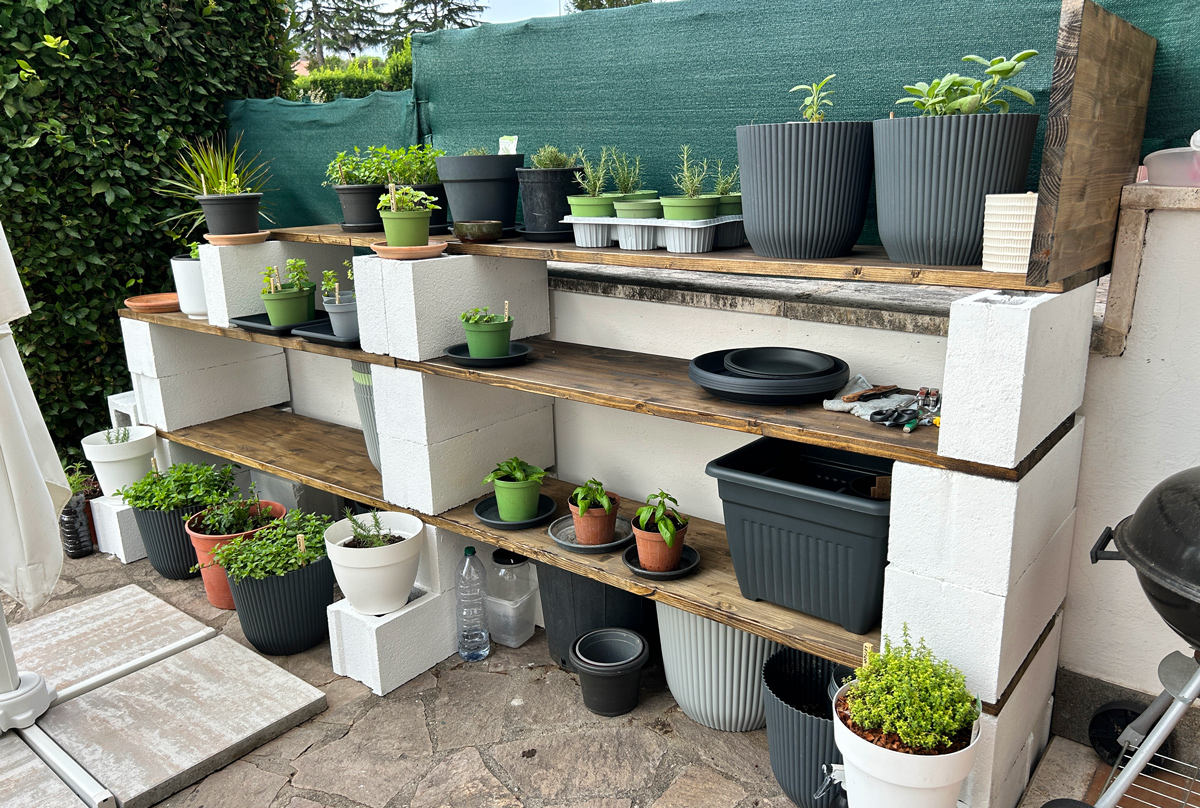
Why staggered, not flat
Most DIY plant shelves I looked at before building this were flat — same depth, same height, right along a wall. Mine isn’t, and that wasn’t an accident.
Cinder block towers cast shade, and how much shade depends on how tall the tower is and what time of day it is. Once I noticed that, it seemed obvious: instead of fighting the shade pattern my own structure was creating, I could design around it. The tier closest to the wall sits in shade for most of the afternoon. The tiers that step further out and sit a little higher catch direct sun for longer. So the plants that sulk in strong afternoon heat went into the shadier spot, and the ones that want as much sun as they can get went into the brighter one.
It’s a small thing, but it means the shelf is doing a bit of the plant-care thinking for me before I’ve even picked up a watering can.
(If you’re planning your own version: before you build, spend a day watching where the shade actually falls on your terrace at different hours. It’s easy to guess wrong from memory.)
Why white blocks and stained wood
The colour wasn’t an afterthought either. My terrace is already white walls and warm wood tones, so building something in bare grey block and raw pine would have looked like it was dropped there rather than designed for the space. I painted the blocks white and stained the timber to match the existing wood tones already on the terrace, so the finished shelf reads as part of the space rather than a garden project parked against the wall.
If your own outdoor space has a colour palette already — even an informal one — it’s worth matching new builds to it rather than treating colour as an afterthought once everything’s built.
The build, step by step
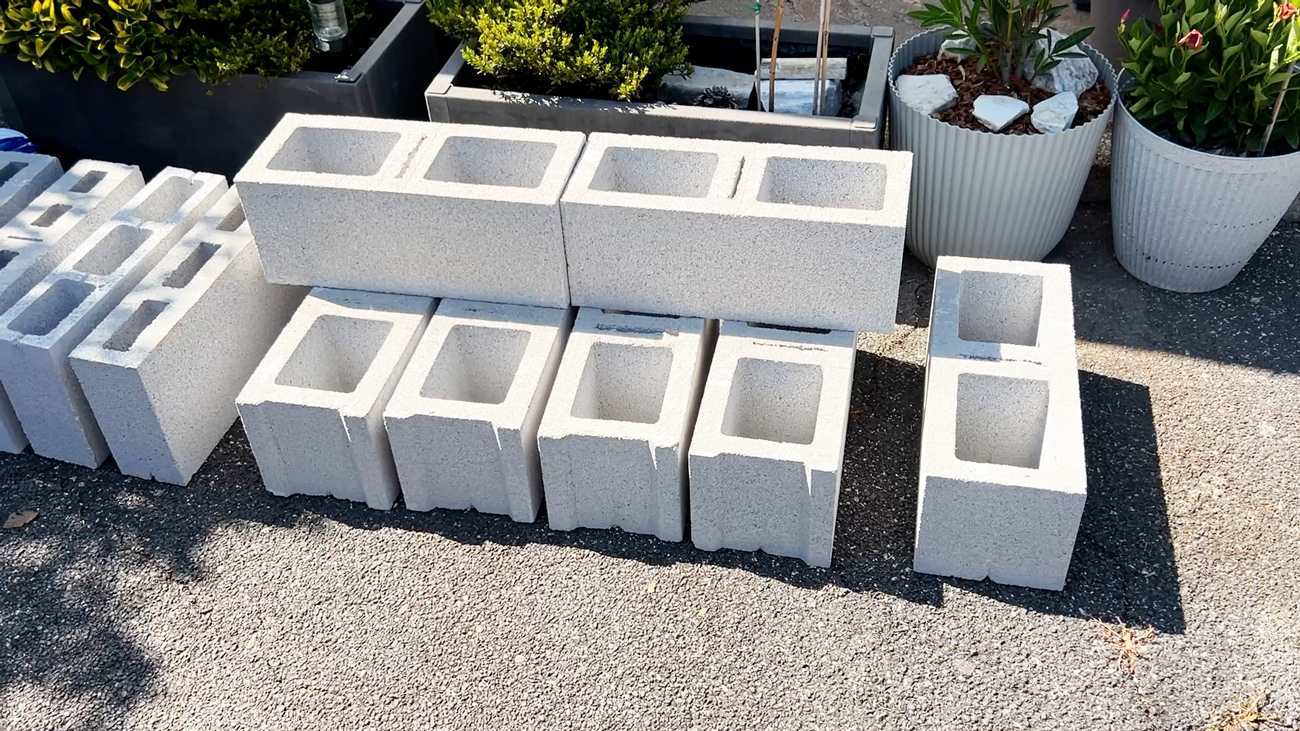
I didn’t build this in place. I laid the blocks and planks out on the driveway first and dry-fitted the whole structure — no mortar, no fixings, just stacked weight — to check the spacing and the staggering actually worked before committing to anything permanent.
What I used:
- 16 cinder/breeze blocks, 50 x 20 20 cm
- 4 cinder/breeze blocks, 40 x 25 x 15 cm
- 6 timber planks/scaffold boards, 150 x 40 x 2
- Stain/sealant for external wood
- White exterior paint for the blocks (if used)
- Total cost: roughly : € 150 / $150
- Build time: 6 hours across 2 days
(See also the video)
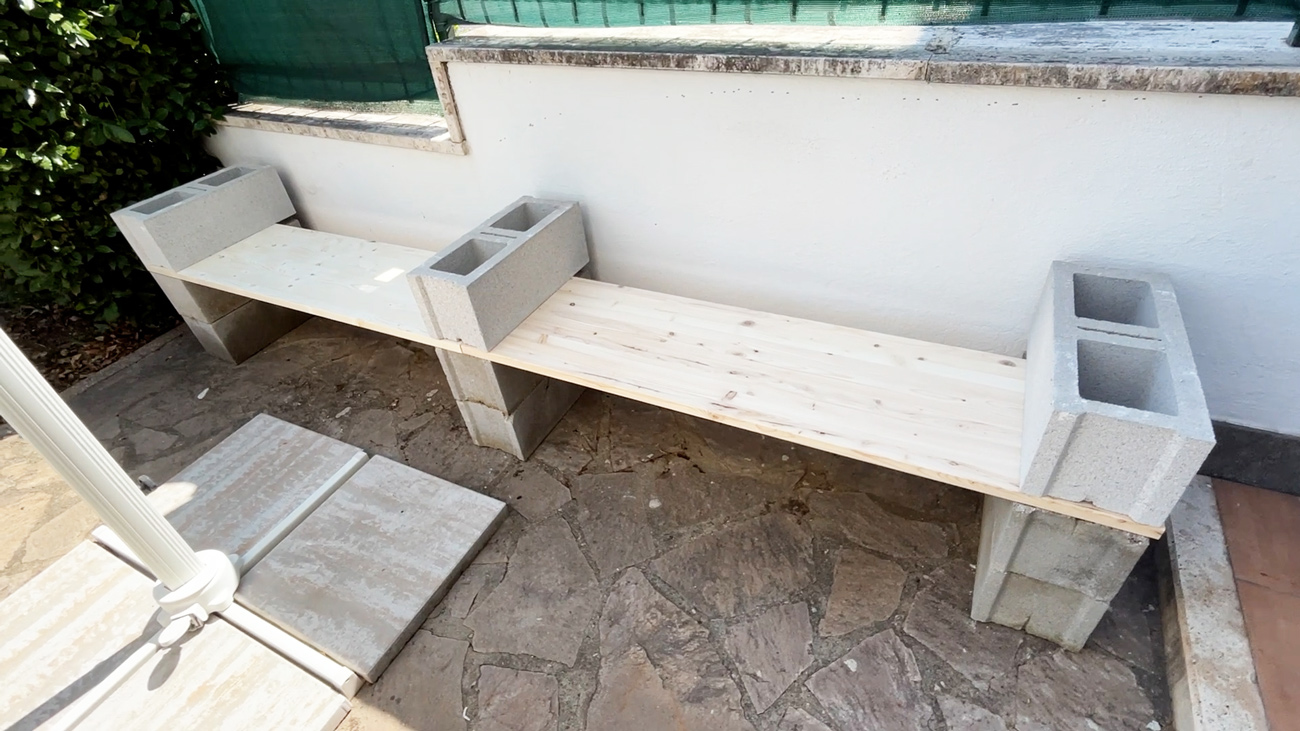
Once the layout was right, it went up against the wall, out of the main walkway. The first tier went up in bare wood, just to get the structure and spacing confirmed in the real spot rather than on the driveway.
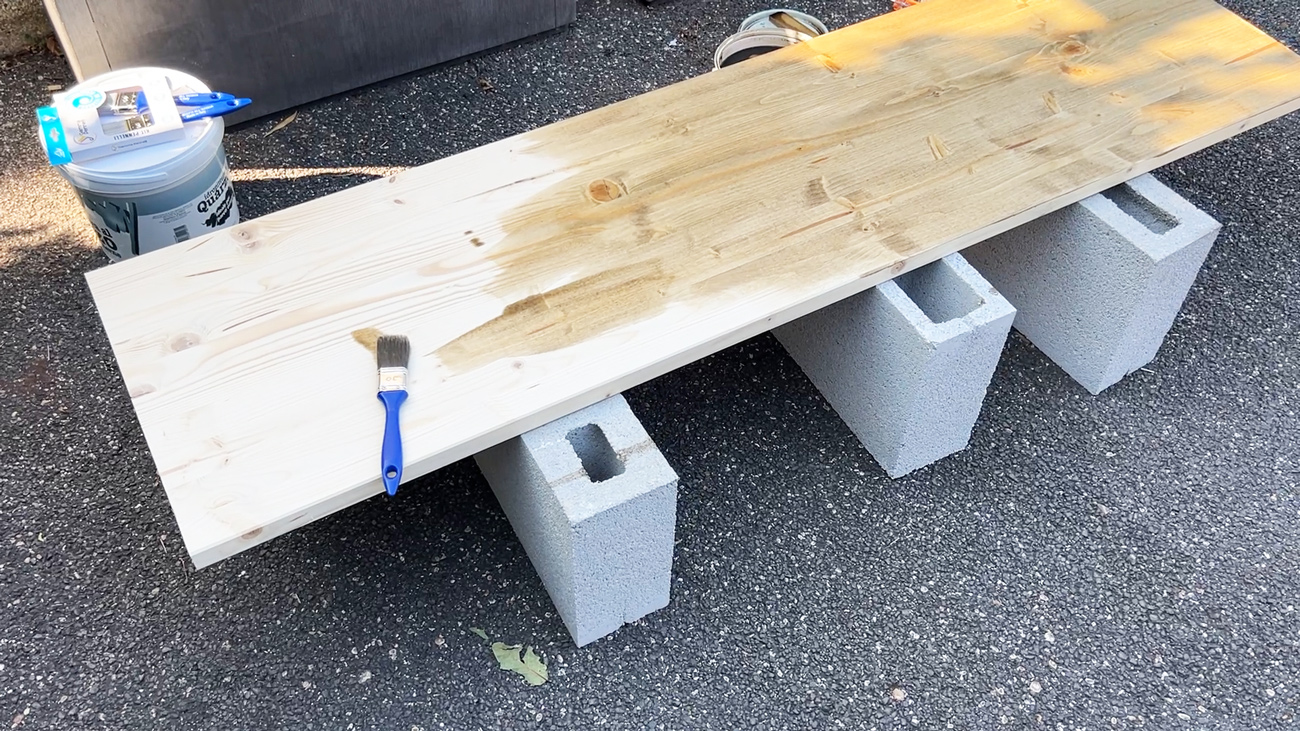
Before any of it went near soil and water long-term, the wood got 2 coats of outdoor stain. Bare timber outside, especially sitting under pots that get watered regularly, doesn’t last — this is the step I’d least recommend skipping if you’re building your own version.
Each additional tier needed its own block columns underneath it, so the weight of every shelf goes straight down to the ground rather than resting on wood spanning between supports unsupported.
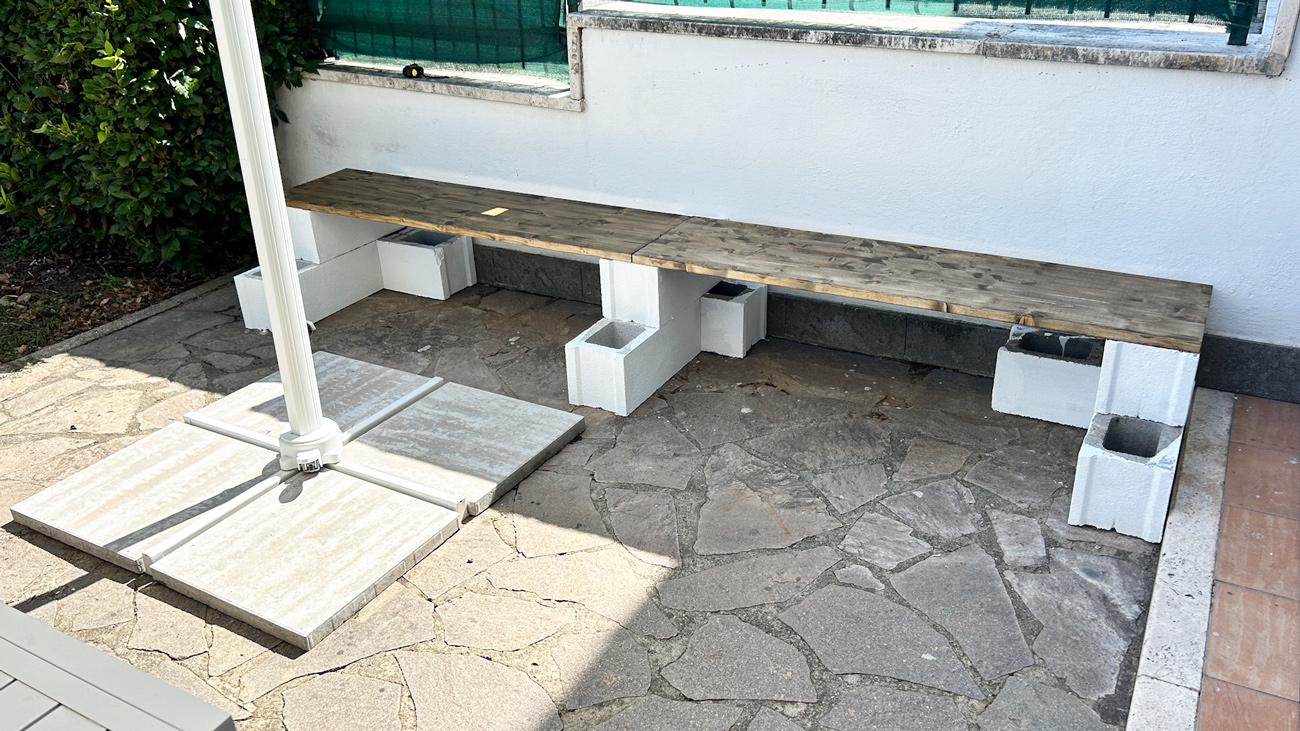
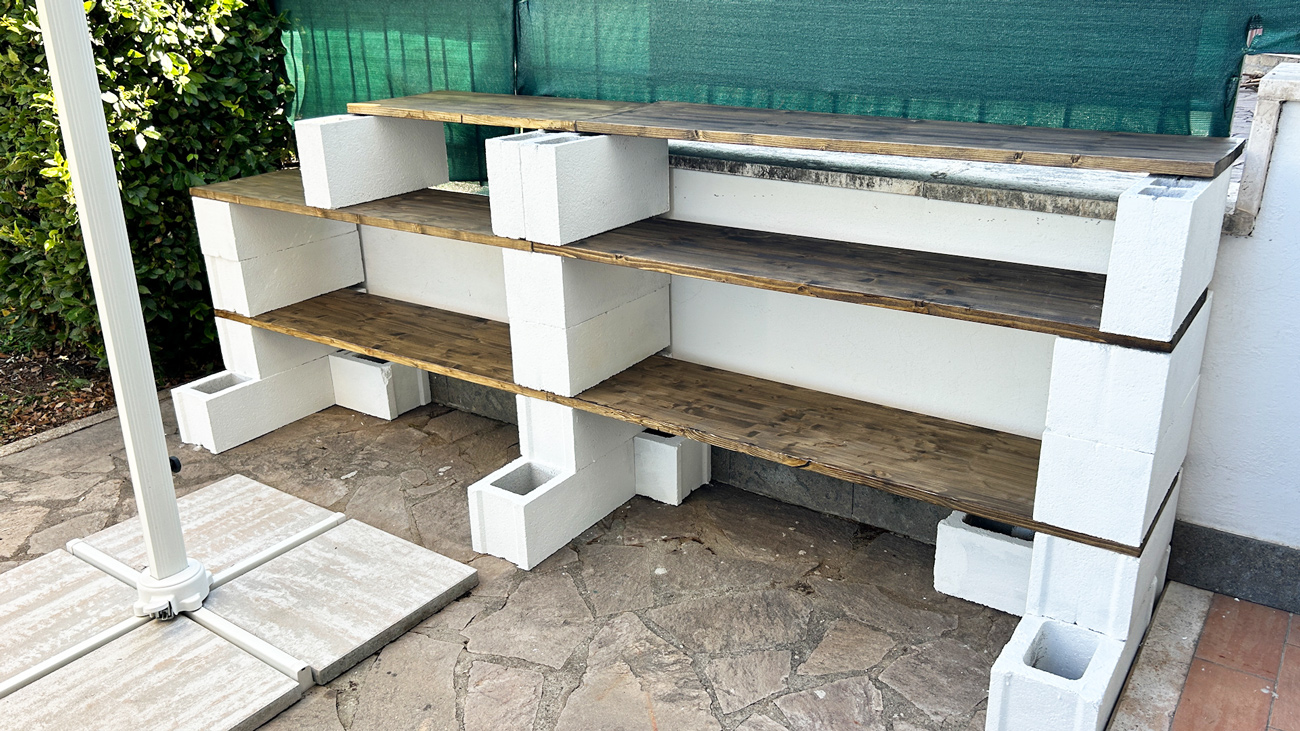
With the wood dry, it all went back on, building upward tier by tier, each one stepping out slightly further than the one below — that stagger is what lets light reach the back of every shelf, not just the front row.
What’s growing where, and why
- Shadier lower tier: bigger mint pots, herbs that tolerate or prefer some afternoon shade; basil cuttings
- Brighter upper/outer tiers: Rosemary cuttings, thyme — herbs that want as much sun as they can get
If you’re setting up something similar, it’s worth checking the light preferences of whatever you’re growing before you decide what goes where — a shelf like this only earns its keep if the placement actually matches what each plant needs.
Things I’d think about if you’re building your own
- Level ground first. Dry-stacked block relies entirely on being level and square — check this before you stack, not after.
- Weight low, heavy pots low. Bigger, heavier pots sit better on lower tiers, both for stability and because it matches how the structure is loaded.
- Watch the shade for a full day before you build, not just at the moment you happen to be outside.
- Don’t rush the stain-drying step — putting pots straight onto wet or under-dried timber undoes the point of sealing it.
Was it worth it?
Yes — mostly for the floor space it freed up, but also because it’s the first “structure” I’ve built on the terrace that actually looks like it belongs there rather than like a garden project. If your outdoor space has uneven light across it — and most do — staggering your shelving to match it is worth more than buying more pots.
Full materials list is above; if you’ve built something similar, or you’re planning to, I’d love to hear how you’re handling the light in the comments.
Here are some of my popular articles:
Please, share your thoughts with us:
Leave a Reply
Want to join the discussion?Feel free to contribute!