
How to Prune Rosemary: The Complete Step-by-Step Guide

Everything you need to know about the what, why, when and how of cutting back rosemary — plus the one rule that will save you from the mistake I made with my first plant.
Quick answer: Prune rosemary lightly and regularly through spring and summer, always cutting just above a leaf pair on stems that still have green, leafy growth. Never cut back into the bare, brown, leafless wood because rosemary won’t reliably regrow from it. As a rule of thumb, don’t remove more than a third of the plant at any one time, and save any harder rejuvenation pruning for late winter or just after flowering, well away from frost. If your rosemary is in a pot, the same rules apply but pot size, drainage and repotting all affect how often you’ll need to prune, so I’ve covered that separately below.
That’s the headline. Now let’s get into the actual “why” and “how”, because rosemary is one of those herbs that punishes guesswork and rewards a little bit of understanding enormously. And whether your plant is in open ground or living its whole life in a terracotta pot by the back door (which, honestly, is how most of us grow it), the same core rule applies; I’ll flag exactly where pots change the picture as we go.
Why Rosemary Pruning Trips Up So Many Beginners
I’ll be honest with you: my first attempt at “tidying up” a rosemary bush ended with a very sad, very bare stick standing in a pot. I’d done what felt logical : cut the whole plant back hard to make it neat again and I’d cut straight through the woody brown stems, right down near the base.
Nothing came back. Not from those stems, anyway.
Here’s what I didn’t understand at the time, and what almost every guide worth trusting agrees on: rosemary only reliably sprouts new growth from wood that still has leaves on it (or is still soft and green/grey-green). Once a stem has turned hard, brown and bare, it has effectively “closed the door” on producing new buds. Cut into that zone and you’re not pruning; you’re amputating a part of the plant that can’t grow back.
This is different from a lot of common garden shrubs (like many roses or hedging plants) that happily resprout from old wood. Rosemary is a Mediterranean, woody-based herb, more closely related in habit to lavender than to something like mint. It builds a permanent woody “skeleton” over time, and only the newer growth along that skeleton stays capable of producing fresh shoots.
The golden rule, in one sentence: always make your cut on green or leafy stem, leaving some leaves or leaf buds below the cut. So never on bare, brown wood !
Everything else in this guide is really just that one rule, applied to different situations (light trims, hard rejuvenation, shaping, indoor plants). Once it clicks, rosemary pruning stops being scary.
Why Bother Pruning Rosemary At All?
Left alone, rosemary doesn’t stay tidy. It grows outward and upward, the base gets shaded out, and after a couple of years you get a plant that’s leggy, woody and bare in the middle, with all the leafy growth pushed out to the tips. It still survives (rosemary is tough) but it stops being the compact, generous, endlessly-harvestable herb you actually want by the kitchen door.
Regular pruning gives you:
- A bushier, denser plant. Cutting a stem tip encourages the plant to branch out just below the cut, so one stem becomes two (or more).
- Better flavour where it counts. The aromatic oils that give rosemary its sharp, piney flavour and scent are concentrated in the newer growth. Old, bare, woody stems contribute almost nothing to the flavour of your cooking.
- Better airflow through the plant. A dense, congested rosemary bush holds moisture and stagnant air in its centre, which is exactly the environment fungal problems and mildew like. A well-pruned plant with some open structure resists that.
- A shape that actually works for your space. Whether that’s a neat low hedge, a rounded bush, a single-stem topiary “lollipop”, or a compact pot for a windowsill.
- A plant that keeps producing. Every light prune is also a harvest. You’re not choosing between “prune it” and “pick it for dinner”: done right, it’s the same action.
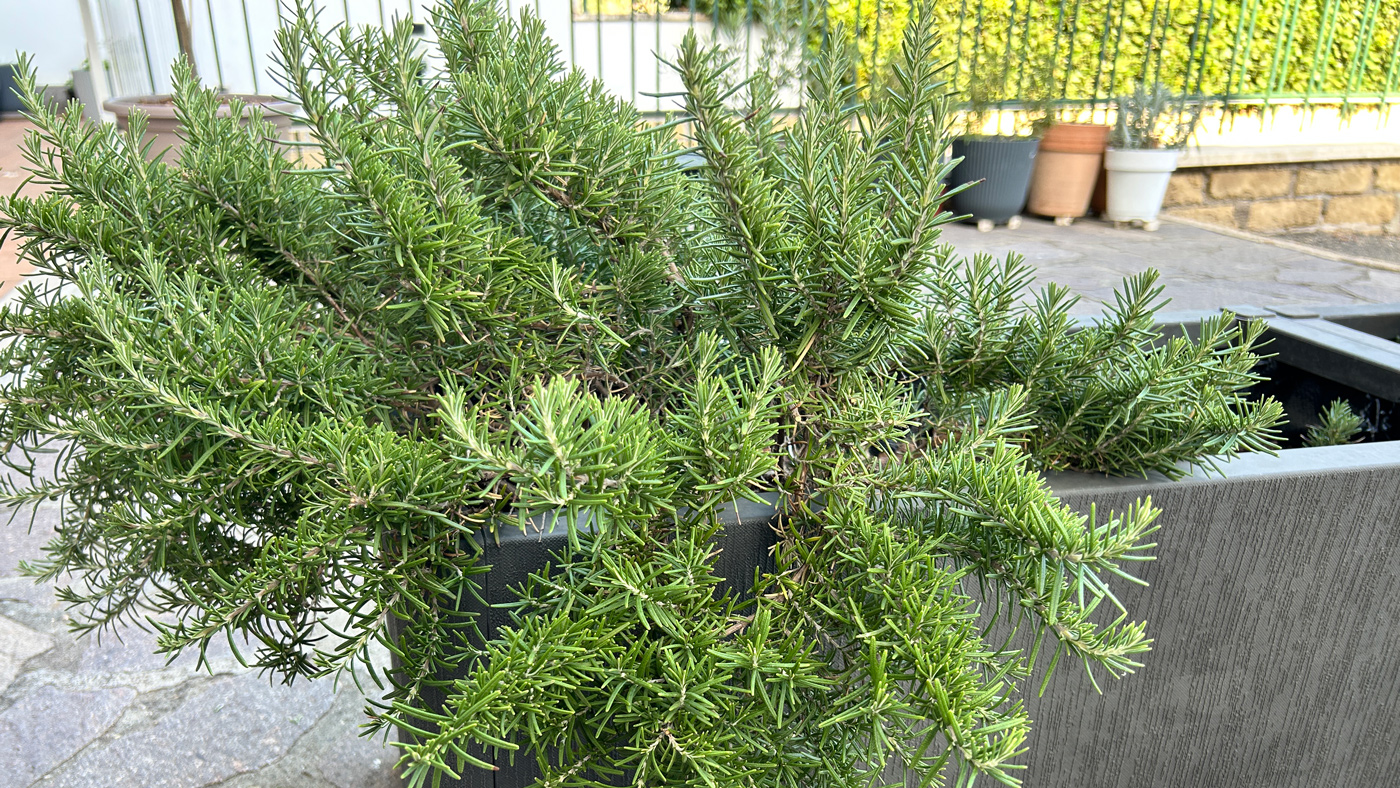
- A safer, more stable pot. This one’s specific to container growing: an unpruned rosemary in a pot gets top-heavy fast, with all its weight pushed out and upward. I’ve had a pot go over in a gust of wind because I’d let the plant get lopsided. A well-shaped, balanced plant is far less likely to tip.
When to Prune Rosemary
Timing is where most of the anxiety about rosemary lives, and it deserves its own section rather than a single line.
For regular, light maintenance trims
The safest and most productive window is from spring through to the end of summer, while the plant is actively growing. In practice, that means:
- Right after flowering finishes is a classic, low-risk moment: rosemary often flowers in spring (sometimes again lightly later in the year), and once the flowers fade is a natural, gentle prompt to tidy the plant.
- Through spring and summer, you can take light trims and harvest sprigs pretty much whenever you like, as long as you’re only ever taking soft, leafy growth and following the one-third rule below.
For a harder, rejuvenation-style prune (leggy or overgrown plants)
If your rosemary has gone woody and leggy and needs a proper cutback, the safest timing is:
- Late winter to very early spring, once the hardest frosts have passed but before the plant has pushed a lot of tender new growth. In mild, frost-free climates this can even happen in winter while the plant is semi-dormant.
- If you’re in a colder climate and worried about frost, wait until after your last expected frost date and prune as new growth is just starting to resume — you’ll be able to see clearly which stems are alive (they’ll be showing green) and which have died back.
What to avoid
- Don’t prune within roughly six weeks of your first expected autumn frost. Pruning stimulates soft new growth, and that tender growth is exactly what frost damages first. A rosemary that’s just been cut hard going into a cold snap is far more vulnerable than one left alone.
- Avoid hard pruning in the depths of summer heat, especially in hot, dry climates — fresh cuts and new growth are more prone to stress and scorch when it’s baking hot.
- Avoid pruning in autumn generally. New growth stimulated in autumn often doesn’t have time to toughen up (“harden off”) before winter arrives, which invites dieback.
- If a hard freeze has already damaged your rosemary, resist the urge to cut it back immediately. Wait until new growth resumes (often around April in temperate climates, but this depends entirely on your local weather) so you can see exactly how far the damage goes before you start cutting. Cutting too early, before you can see what’s alive, risks removing wood that would have recovered.
A note on climate and outdoor vs indoor rosemary
Rosemary is reliably hardy as a permanent outdoor shrub in warmer zones (broadly USDA zone 8–9 and up, or wherever winter lows don’t drop much below around -7°C/20°F). In cooler regions, some cultivars bred for hardiness (like ‘Arp’ or ‘Hill Hardy’) can survive outdoors in zone 6–7 with a sheltered spot and a good mulch over the roots but they’re still working harder than a rosemary grown in a Mediterranean climate.
If you’re in a colder zone than that, rosemary is usually grown as a container plant that comes indoors for winter, or treated as an annual. Your own climate should always take priority over any date I give you here: “after the last frost” is a far more reliable instruction than a specific calendar month.
If your rosemary moves indoors for winter
This is worth calling out on its own, because it’s a common timing mistake with potted rosemary: don’t give your plant a hard prune right before you bring it indoors for the cold months. Moving indoors is already a stressful transition for the plant (different light, different humidity, disturbed roots if you’re repotting at the same time); piling a hard cutback on top of that at the same moment is a lot to ask of it in one go. Let it settle indoors first, keep to light pinching if anything, and save any bigger rejuvenation-style prune for midwinter, once the plant has adjusted and is sitting fairly dormant under its indoor conditions.
What You’ll Need: Rosemary Pruning Tools
You don’t need anything fancy, but the right tool for the right stem makes a real difference – both to the plant’s health and to how satisfying the job is.
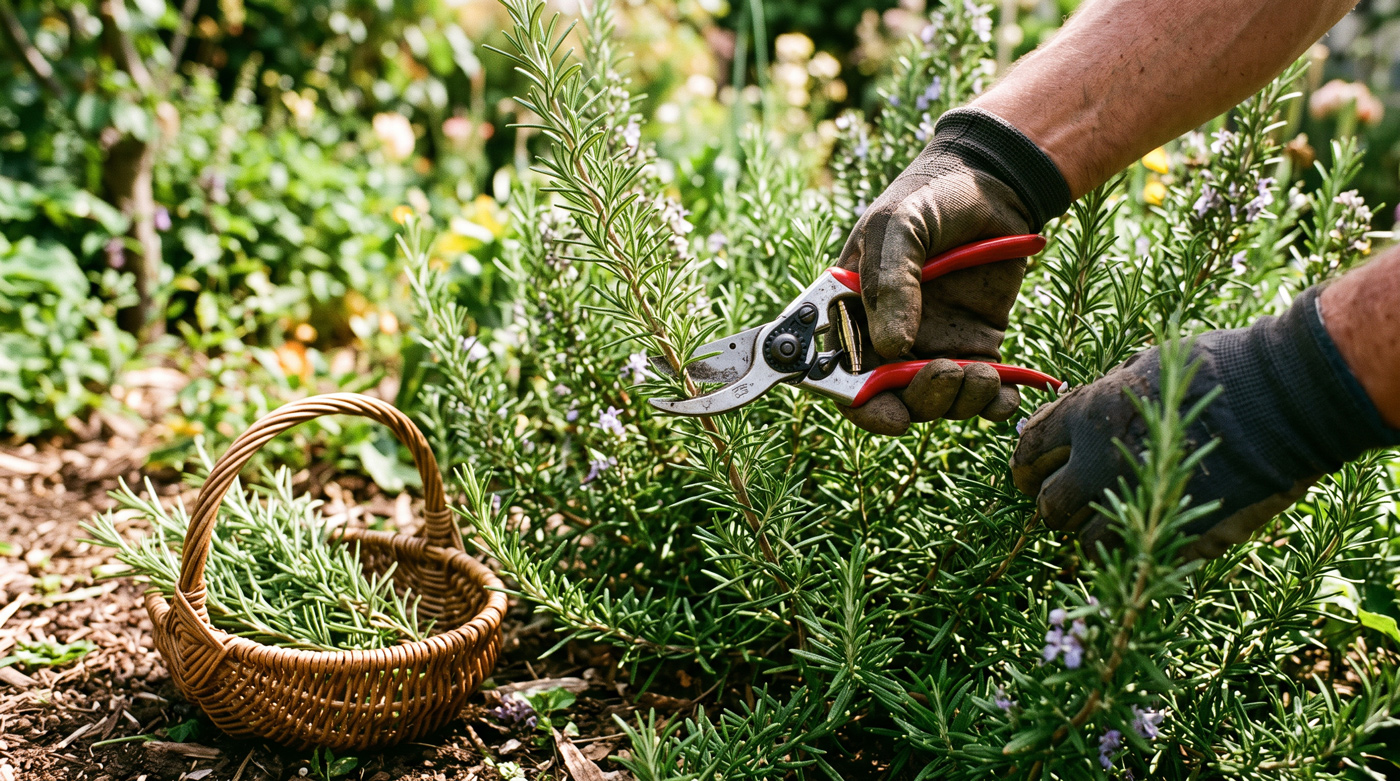
- A pair of sharp bypass secateurs (hand pruners). “Bypass” means the blades slide past each other like scissors, giving a clean cut — as opposed to “anvil” pruners, which crush a blade against a flat edge and can bruise soft plant stems. This is your main tool for the majority of rosemary stems.
- Garden loppers, for anything genuinely thick and woody — useful mainly during a rejuvenation prune on an older, more established shrub, less so for routine maintenance.
- Rubbing alcohol (or a similar disinfectant) and a cloth, to wipe your blades clean before you start and between plants. Dirty tools can spread disease from one plant to the next — a five-second wipe is cheap insurance.
- Gloves, optional, but handy if you’re working with an older, harder plant with a lot of stiff, woody stems.
- A basket, bowl or container for what you cut, because almost everything you trim off rosemary is usable (see the “don’t waste your prunings” section below).
- If you’re also repotting, add a trowel and fresh, gritty, free-draining potting mix to the list. Spring rejuvenation pruning and repotting pair naturally, since you’ll already have the plant out and can check the roots at the same time (more on this below).
Keep your blades sharp. A dull, dragging cut bruises the stem instead of slicing it cleanly, and a bruised, ragged wound is slower to heal and more open to disease than a clean one.
How to Prune Rosemary, Step by Step (Regular Maintenance)
This is the routine, low-risk prune you can do through most of the growing season — the one that doubles as a harvest.
Step 1: Stand back and look at the whole plant first. Before you make a single cut, walk around it (or turn the pot). Look for the overall shape you’re working with, any obviously dead or brown sections, and any stems crossing through the centre of the plant.
Step 2: Clean your tools. A quick wipe with rubbing alcohol on a cloth, especially if you’ve just used the same secateurs on another plant.
Step 3: Remove the “three D’s” first — dead, damaged and diseased growth. Cut these out regardless of shape or size, tracing them back to healthy, green tissue. This alone often improves the look of the plant and its airflow.
Step 4: Remove any crossing or inward-growing stems. Where two stems rub against each other or grow into the centre of the bush, take one out at its base. This opens the plant up and reduces the damp, congested conditions that invite fungal problems.
Step 5: Make your shaping cuts. For each stem you want to shorten, follow the golden rule: find a point on that stem that still has leaves (or visible leaf buds), and cut just above a leaf pair or a side shoot, at a slight angle (roughly 45°). Cutting just above a leaf node isn’t fussy perfectionism — it’s where the plant is set up to produce its next shoots, so your cut heals faster and the regrowth comes from the right place.
Step 6: Keep to the one-third rule. As a general guide, don’t remove more than about a third of the plant’s total growth in one session. This applies whether you’re “pruning” or “harvesting” — for rosemary, they’re really the same action. Taking more than that in one go stresses the plant and can push it towards exactly the leggy, bare-based habit you’re trying to avoid.
Step 7: Pinch the soft tips for extra bushiness. On young, soft, new growth, you can simply pinch out the top centimetre or so (about half an inch) between finger and thumb — no tool needed. This encourages that shoot to split into two, building density without a hard cut. It’s a great habit to get into every few weeks through the growing season.
Step 8: Step back and check the shape. Rosemary responds well to being viewed the way you’d check a haircut, from a few steps back, from more than one angle, before you decide you’re finished.
Step 9: Tidy up and carry on as normal. Water as you usually would (pruning doesn’t change rosemary’s watering needs: it still wants to dry out somewhat between waterings). A light feed with an organic, general-purpose fertiliser after a prune can help support new growth, but rosemary is not a hungry plant and doesn’t need heavy feeding.
How to Cut Back an Overgrown, Woody or Leggy Rosemary
This is the situation that scares people the most — and where that golden rule matters even more.
Step 1: Take out insurance first. Before you cut anything, snip 4–6 soft, healthy stem tips (about 10–15 cm / 4–6 inches long) and pop them in water or straight into a light, free-draining potting mix to root as cuttings. If the parent plant doesn’t bounce back the way you hope, you’ll already have replacements on the way. (This is genuinely one of my favourite “no-risk” gardening habits; worst case, you’ve got a couple of spare plants for free.)
Step 2: Do the scratch test if unsure. Gently scrape a tiny bit of bark off a stem with your fingernail. Green or pale tissue underneath means that section is alive; dry, brown, papery tissue all the way through usually means that part is dead. This tells you where your “safe zone” actually is on this particular plant, rather than guessing.
Step 3: Cut back to roughly half the plant’s size — but only where there’s still green, leafy growth to cut back to. A rosemary that’s simply grown large and leggy (rather than one that’s genuinely dead through the middle) will usually tolerate being reduced by around 50%, as long as every cut lands on a stem section that still has leaves or leaf buds below it. Do not cut into fully bare, brown wood expecting it to resprout — for most rosemary plants, it won’t.
Step 4: If the plant is very overgrown or old, consider doing this over two seasons rather than one. Rather than taking the full 50% reduction in a single session, take it in two smaller stages roughly a year apart. It’s a slower path back to a good shape, but it’s a gentler one, and it reduces the risk of shocking an older plant too hard in one go.
Step 5: Expect it to look sparse for a little while. This is the part that catches people out — right after a hard prune, the plant can look worse, not better. That’s completely normal. New shoots typically start appearing within a few weeks during the growing season. Resist the urge to “help” with heavy feeding or extra water in the meantime; steady, normal care is what it needs.
Step 6: Know when to just replace it instead. If the scratch test shows dead, brown, dry tissue right down to (or below) ground level with no green sections left to cut back to, that plant has likely died, and pruning won’t bring it back. This is where the cuttings you took in Step 1 (or a fresh plant from the garden centre) come in : sometimes starting again really is the better use of your time than nursing something that’s already gone.
Shaping Rosemary: Hedge, Topiary and Trailing Forms
Rosemary is genuinely versatile once you understand the golden rule, because shaping is just repeated light pruning with an end goal in mind.
- As a low hedge: upright varieties respond well to being trimmed as a neat, low hedge if you trim them annually, right after flowering, following the same “cut above leafy growth” principle along the whole row. Skip a year or two and it gets much harder to bring back into a tidy line.
- As a topiary or standard (“lollipop”): this takes patience. You choose one strong central stem as the main “trunk”, remove competing side shoots low down, and let it grow to your desired height before pinching out the growing tip to encourage a rounded head to form at the top. From there, it’s regular light trimming of that head to keep the shape.
- Trailing/prostrate rosemary (grown in pots, over walls or as ground cover) needs a lighter touch — mainly trimming to stop the centre becoming bare and woody, rather than shaping upward growth.
Pruning Rosemary in Pots: What Container Growers Need to Know
If you’re growing rosemary in a pot — on a patio, a balcony, by a doorway, or as a permanent windowsill plant — everything above still applies. The golden rule doesn’t change: cut above leafy growth, never into bare wood. But a container changes the context the plant is growing in, and that changes how often, and how carefully, you need to prune. Here’s what’s different.
Why potted rosemary tends to need more frequent attention
A rosemary in the ground can send roots out as far as it needs to. A rosemary in a pot is working with a fixed amount of soil, water and nutrients, and it’s far more prone to becoming root-bound over time. A root-bound plant often shows it up top as exactly the leggy, sparse, “reaching” growth this whole guide is about fixing — so with container rosemary, pruning and repotting are two sides of the same coin, not separate jobs.
Getting the container right (so pruning has less to fix)
A good chunk of “pruning problems” on potted rosemary actually trace back to the pot itself:
- Size matters. Start with a pot at least 30 cm (about 12 inches) across, with a proper drainage hole — non-negotiable, since rosemary sitting in soggy, waterlogged compost is far more likely to decline than one that’s slightly under-fed.
- Use a free-draining mix, not a standard moisture-retentive compost. A gritty, open mix — potting compost blended with perlite, coarse sand or fine bark — mimics the lean, well-drained soil rosemary grows in naturally and goes a long way towards preventing the root problems that get mistaken for pruning trouble.
- Repot roughly once a year, typically in spring, stepping up to a pot around 50% larger (or double the volume) each time, until you’re happy with its final size. When you tip the plant out, gently tease apart any tightly circling roots, and avoid burying the crown (where the stems meet the roots) any deeper than it was sitting before.
Pruning and repotting together
Spring is a genuinely efficient time to do both jobs in one sitting: tip the plant out, loosen and lightly trim any congested or circling roots, refresh the potting mix, and — while you’re there — do your rejuvenation prune on the top growth at the same time, following the same “never into bare wood” rule as always. Reducing the roots a little and reducing the top growth a little in the same session keeps the plant in proportion, rather than leaving a large top on a root system you’ve just disturbed.
How much to prune a potted rosemary
The same guidance holds: light trims of no more than about a third through the growing season, and up to around half in a proper rejuvenation prune — always onto leafy growth. Because container rosemary is more prone to getting top-heavy and leggy faster than an in-ground plant, don’t be surprised if it needs that once- or twice-yearly proper trim (in spring after flowering, and optionally again in late summer for a vigorous plant) even if you’re pinching it regularly too.
Choosing a variety that suits pot life
If you’re starting a new plant specifically for a container, a naturally compact or dwarf cultivar (rather than a large upright type bred for hedging) will simply need less pruning to stay in proportion to its pot. A trailing/prostrate type, on the other hand, is lovely spilling over the edge of a container but needs a different eye — trim mainly to stop the centre going bare and woody, rather than shaping it upward.
Extra care for rosemary indoors or overwintering as a pot plant
A huge share of container rosemary spends at least part of the year indoors — on a windowsill or under grow lights, or brought in for winter — and that changes two things about pruning:
- Airflow matters more. Indoor rosemary is far more prone to powdery mildew and fungal issues than outdoor plants, mainly because indoor air is often stiller and more humid around the leaves. Regular, light trimming to keep the centre of the plant open is one of the simplest things you can do to prevent this.
- Little and often beats one big prune. Indoor rosemary tends to grow more slowly and more leggily (reaching for light) than outdoor plants, so frequent small pinches — every couple of weeks — usually suit it better than an occasional hard cutback. Save any proper rejuvenation prune for once the plant has settled indoors and is sitting fairly dormant (see the timing note above on moving plants indoors).
- Watch for heater-dryness, not just light. Rosemary wintering indoors near a radiator or heating vent can dry out fast, and a stressed, drought-affected plant is a poor candidate for pruning. Sort out its position and watering first if it’s looking sorry for itself, rather than assuming a trim will fix it.

Common Mistakes (and How to Avoid Them)
- Cutting into bare, brown wood. This is the one that got my first rosemary. If you remember nothing else from this guide, remember this.
- Pruning hard right before your first frost. You’re inviting fresh, tender growth into weather that will damage it.
- Ignoring the plant for years, then hacking it back all at once. A little light pruning every few weeks through the growing season prevents the situation where you “have” to do a drastic rescue prune later.
- Using dull or dirty tools. A ragged cut heals more slowly and is more vulnerable to disease; dirty blades can carry disease between plants.
- Taking more than a third of the plant in one sitting, out of enthusiasm or because “it needed it”. Rosemary would rather you came back in two weeks and took a little more.
- Assuming every rosemary can take the same hard treatment. A large, established garden shrub in a mild climate can usually shrug off a firm rejuvenation prune. A young plant, a stressed plant, or a container plant that’s been struggling for other reasons (poor drainage, root problems) is far less able to cope with the same treatment — sort out the underlying growing conditions first.
- Blaming pruning for a problem that’s actually about watering or drainage. Rosemary is far more likely to decline from soggy roots or poor drainage than from correct pruning. If your rosemary looks unwell despite careful pruning, it’s worth checking your watering and pot drainage before assuming the prune itself is the problem.
- Letting a potted rosemary get root-bound and top-heavy before doing anything about it. In a container, legginess and a cramped root system usually arrive together — if you’re only ever addressing the top growth and never checking the roots or repotting, you’re fighting the same battle every year.
- Hard-pruning right before moving a potted plant indoors for winter. Give it time to settle into its new spot first; save the bigger cutback for once it’s adjusted.
Don’t Waste Your Prunings
Every trim you take off a rosemary plant is usable for something — this is one of the small, satisfying parts of the job:
- Fresh in the kitchen, obviously — the soft, leafy tips are the best-flavoured part of the plant.
- Dried for later. Hang small bundles somewhere warm, dry and out of direct sun, or use a dehydrator, then store in an airtight jar.
- Rooted as new plants. Soft tip cuttings, 10–15 cm (4–6 inches) long, root readily in water or a light potting mix — see our guide on propagating herbs from cuttings for the full method.
- Sturdy stems as skewers. Stripped, straight, woody stems make genuinely great flavoured skewers for the barbecue.
- Simple bundles or wreaths, if you’ve got a decorative streak — rosemary holds its shape and scent well once dried.
A Real Example From My Garden
The plant that taught me all of this was a rosemary I’d had for about two years, grown from a small nursery pot into a decent-sized bush. I hadn’t touched it beyond the odd sprig for cooking, and by the second summer it had gone properly leggy — tall, sparse, with all the leaves out at the tips and a woody, bare tangle underneath.
My first move was wrong: I took it back hard, all in one go, and cut well into that bare lower wood because it “looked neater” that way. About half the plant simply never came back. What did regrow only came from the sections where I’d — more by luck than judgement — happened to cut just above some leafy growth.
The plants I have now gets treated completely differently: a proper trim after it flowers each spring, regular pinching of the soft tips through summer, and if it ever needs a harder cutback, I do the scratch test first and take cuttings as insurance before I touch a single stem. It’s never looked leggy since, and I get far more usable rosemary off it through the season than I ever did trying to “rescue” an overgrown plant in one afternoon.
Quick-Reference FAQ
How often should I prune rosemary? Little and often is best — light trims or pinching every couple of weeks through the growing season, rather than one big annual cut.
Can rosemary regrow from old wood? Reliably, no. Rosemary regrows from stem sections that still have leaves or leaf buds. Bare, brown, woody stems generally won’t produce new shoots, so always cut above green growth.
How much can I cut off rosemary at once? For routine maintenance, no more than about a third of the plant. For a rejuvenation prune on an overgrown but still-healthy plant, up to around half can work — but only where you’re cutting back to leafy growth, not bare wood.
Can I prune rosemary in autumn or winter? Avoid hard pruning in autumn, and avoid pruning within about six weeks of your first frost — the new growth it triggers won’t have time to toughen up. A rejuvenation prune is better placed in late winter/very early spring, once the worst of the cold has passed, or after your last frost date in colder climates.
Will pruning make my rosemary bushier? Yes — pinching or cutting a stem tip encourages the plant to branch just below the cut, which is exactly how you build a denser, fuller plant over time.
My rosemary looks half-dead. Should I prune it? Do the scratch test first (gently scrape the bark to check for green tissue underneath) before you cut anything, and take a few insurance cuttings. If there’s green tissue and some leafy growth left, a careful rejuvenation prune can work. If it’s dry and brown right down to the base, it’s likely gone, and starting fresh (from your own cuttings, or a new plant) is usually the better use of your time.
Do I need to prune rosemary in a pot differently to one grown in the ground? The core rule is identical — always cut back to leafy growth, never bare wood. The difference is frequency and cause: potted rosemary tends to go leggy and root-bound faster than an in-ground plant, so it usually benefits from a proper prune once or twice a year (not just occasional pinching), ideally paired with repotting in spring.
Why does my potted rosemary keep getting top-heavy and want to tip over? This is a container-growing problem more than a pruning mistake — an unpruned rosemary pushes most of its growth outward and upward, which unbalances a pot. Regular light pruning to keep a rounded, even shape (rather than letting it grow tall and lopsided on one side) keeps the plant — and the pot — stable.
If your rosemary has been through the wars, I’d genuinely love to know how it’s looking now — drop a comment below, or bring a photo into the Amazing Herb Garden Community on Facebook; it’s exactly the kind of “is this normal?” question the group is there for. And if you’d like the whole pruning routine (rosemary and the rest of your herbs) as a printable cheat sheet you can keep by the back door, pop your email in below and I’ll send it straight over.
Related reading:
How to Propagate Rosemary from Cuttings
Common Rosemary Problems (and How to Fix Them)
How to Grow Rosemary in Pots
How to Grow Rosemary Indoors
Leave a Reply
Want to join the discussion?Feel free to contribute!