
Growing Lemon Thyme: Everything I‘ve Learned (Including Why Mine Still Isn’t Growing Back Lavishly)
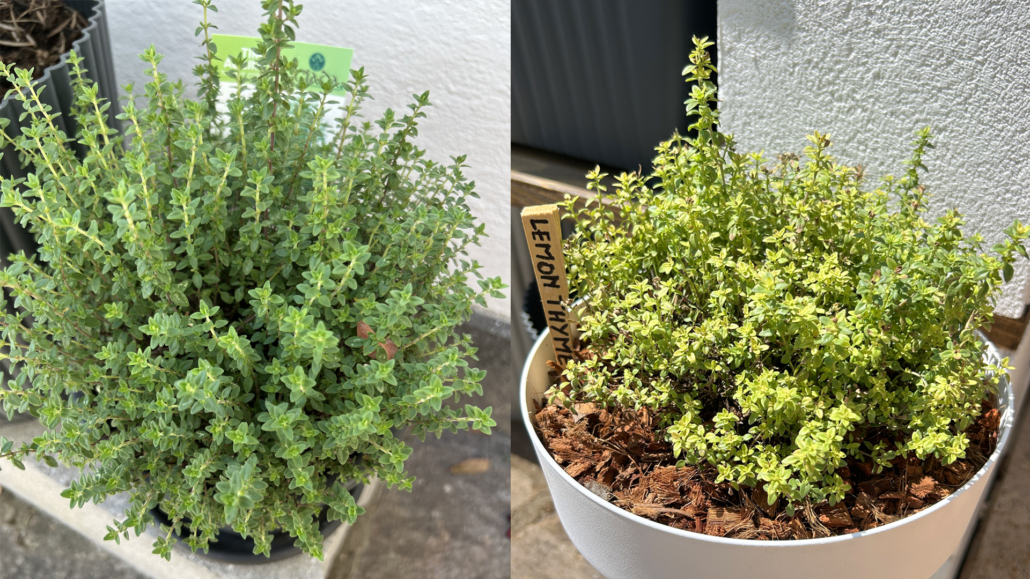
Last year in late summer time I bought a Lemon Thyme (Thymus citriodorus) plant that arrived looking like a perfect little dense green mound. I gave it a hard prune in early spring, and it’s grown back — just not as lavishly as I have hoped. Patchy in places, sparse in others, nowhere near the full cushion it started as. Rather than wait until I’ve got it looking perfect again, I wanted to write up everything I’ve actually learned working through this, alongside everything else worth knowing if you’re growing (or thinking about growing) lemon thyme yourself.
But first, in my opinion Lemon Thyme is a must for any herb garden, also in pots!
This great herb has all the characteristics of common thyme but then with an added sweet citrus aroma in the herb garden.
Quick facts if you’re in a hurry:
- Sun: 6–8 hours of direct sun a day
- Water: let the soil dry out properly between waterings — this is a dry-loving herb
- Soil: loose, free-draining, slightly alkaline (perlite, grit or coarse sand mixed in helps)
- Hardiness: USDA zones 5–9, evergreen in zones 8–9; needs winter protection or containers brought in below that
- Prune: regularly, but never into bare old wood (more on this below — it’s the mistake I made)
What is lemon thyme, and why grow it
Lemon thyme (Thymus × citriodorus) is a low, bushy Mediterranean herb — a relative of common thyme, but with a distinct citrus scent and flavour running through the leaves alongside the usual thyme earthiness.
It’s evergreen where winters are mild, stays compact, and like most Mediterranean herbs, it actually performs best when it’s left a little neglected rather than fussed over.
How to grow it: sun, soil and pot
Before the care basics, it’s worth knowing what you’re actually looking at. The leaves are tiny — roughly 0.5–0.6 cm (a quarter of an inch) long, lance-shaped, and packed densely along young stems. Colour varies by plant: mid to dark green on the straight species, streaked with silver, white or yellow on the more ornamental variegated cultivars.
From late spring into early summer it sends up small lavender-pink, two-lipped flowers that pollinators are drawn to — and the flowers carry the same lemon scent as the leaves, so they’re genuinely worth using as an edible garnish rather than just deadheading them off. Left alone, it grows into a compact, upright mound around 30 cm (12 in) tall, spreading anywhere from 30–60 cm (12–24 in) depending on the variety.
That small size, paired with its taste for poor, free-draining soil, is exactly why it suits container growing so well — it’s one of the better Mediterranean herbs for a pot on a balcony or terrace. It’s happy sharing space with other Mediterranean herbs after the same conditions, like sage and rosemary. Beyond the kitchen, it earns its keep as an ornamental too — the variegated varieties in particular work well as a low, fragrant edging plant.
It wants 6–8 hours of direct sun a day. Anything less — say 4–6 hours — and it’ll survive, but it goes open, leggy, produces fewer leaves, and the flavour weakens. It’s not a shade-tolerant herb, however forgiving it looks.
Soil should be loose and free-draining, ideally slightly alkaline. A heavy, moisture-retentive potting mix works against it — mixing in perlite, horticultural grit, or coarse (never fine/play) sand at roughly 25–30% of the volume opens the mix up properly. A terracotta pot helps too, since it lets moisture evaporate out through the sides rather than sitting trapped the way it does in plastic.
Hardiness: it’s rated for USDA zones 5–9, staying evergreen through winter in zones 8 and 9. Outside that range, or if you’re growing in a pot on an exposed balcony or terrace, it’ll need either winter protection (a couple of inches of mulch over the roots) or bringing indoors/somewhere sheltered before frost. Wet winter soil is actually more likely to kill it than the cold itself — drainage matters just as much in winter as summer.
Watering lemon thyme properly (this is the bit I got wrong at the start)
This is where most of my own struggle has actually been, so it’s worth going into properly rather than the usual one-line “let it dry out” advice.
My go-to now: the dry stick test. I’ve moved away from relying on my finger for this, since I never felt confident reading it properly, and the stick test removes the guesswork. Push a bare, dry wooden skewer or chopstick down to about two-thirds of the pot’s depth, leave it 30 seconds to a couple of minutes, then pull it out and look. Clean and dry means it’s time to water. Particles clinging with visible darkening means it’s still fine, wait a bit longer. A muddy coating means it’s too wet — don’t water, and check your drainage. It works because it samples moisture across the whole depth of the pot in one go, rather than relying on how good your fingertip is at judging “damp.”
The finger test, if you’d rather not use a stick: don’t just poke the very top — go down about 5 cm (two knuckles), not the usual first-knuckle depth, since the top layer dries fastest and is the most misleading part of the pot. Dry soil feels loose and crumbly and falls straight off your finger. Properly moist soil — the zone you’re aiming for before you water again — feels cool, and only a few small particles cling to your skin without it holding together. Wet, too-soon-to-water soil clumps together like dough and feels cold, sometimes leaving a visible damp smear.
The hydrophobic soil trap: if your mix has a lot of coco coir in it (mine does — it came topped with a coir mulch), there’s a specific failure mode worth knowing about. Once coir dries out fully, it can go hydrophobic — meaning it actively repels water rather than absorbing it. Water poured on top then just channels down the gap between the dried-out root ball and the inside of the pot, and runs straight out the drainage holes without ever properly rehydrating the centre. You can end up watering regularly and still having a thirsty, stressed plant, because the water genuinely isn’t reaching the roots.
How to tell: watch what happens next time you water — does it disappear fast down the inside edge of the pot, or soak evenly into the surface? If it’s the former, that’s hydrophobic soil.
The fix: a bottom-water soak. Sit the whole pot in a basin of a few centimetres of water for 15–20 minutes, letting the moisture wick up from the bottom through the drainage holes into the root ball. This isn’t something to do routinely for a dry-loving herb like lemon thyme — it should stay the exception, not the schedule — but it’s the right rescue move when the soil has gone properly water-repellent and top watering alone isn’t fixing it.
Pruning lemon thyme (the actual mistake I made)
Here’s the thing nobody tells you before you pick up the shears: as thyme stems mature, the growing points move out towards the tips.
The older, grey-brown wood lower down almost entirely loses the ability to produce new shoots.
So when you prune, the plant can only regrow from wherever there was still some living green growth on the stem — not from bare woody sections, no matter how solid that wood looks. I have made this mistake also on Thyme Vulgaris, as shown on the picture below.
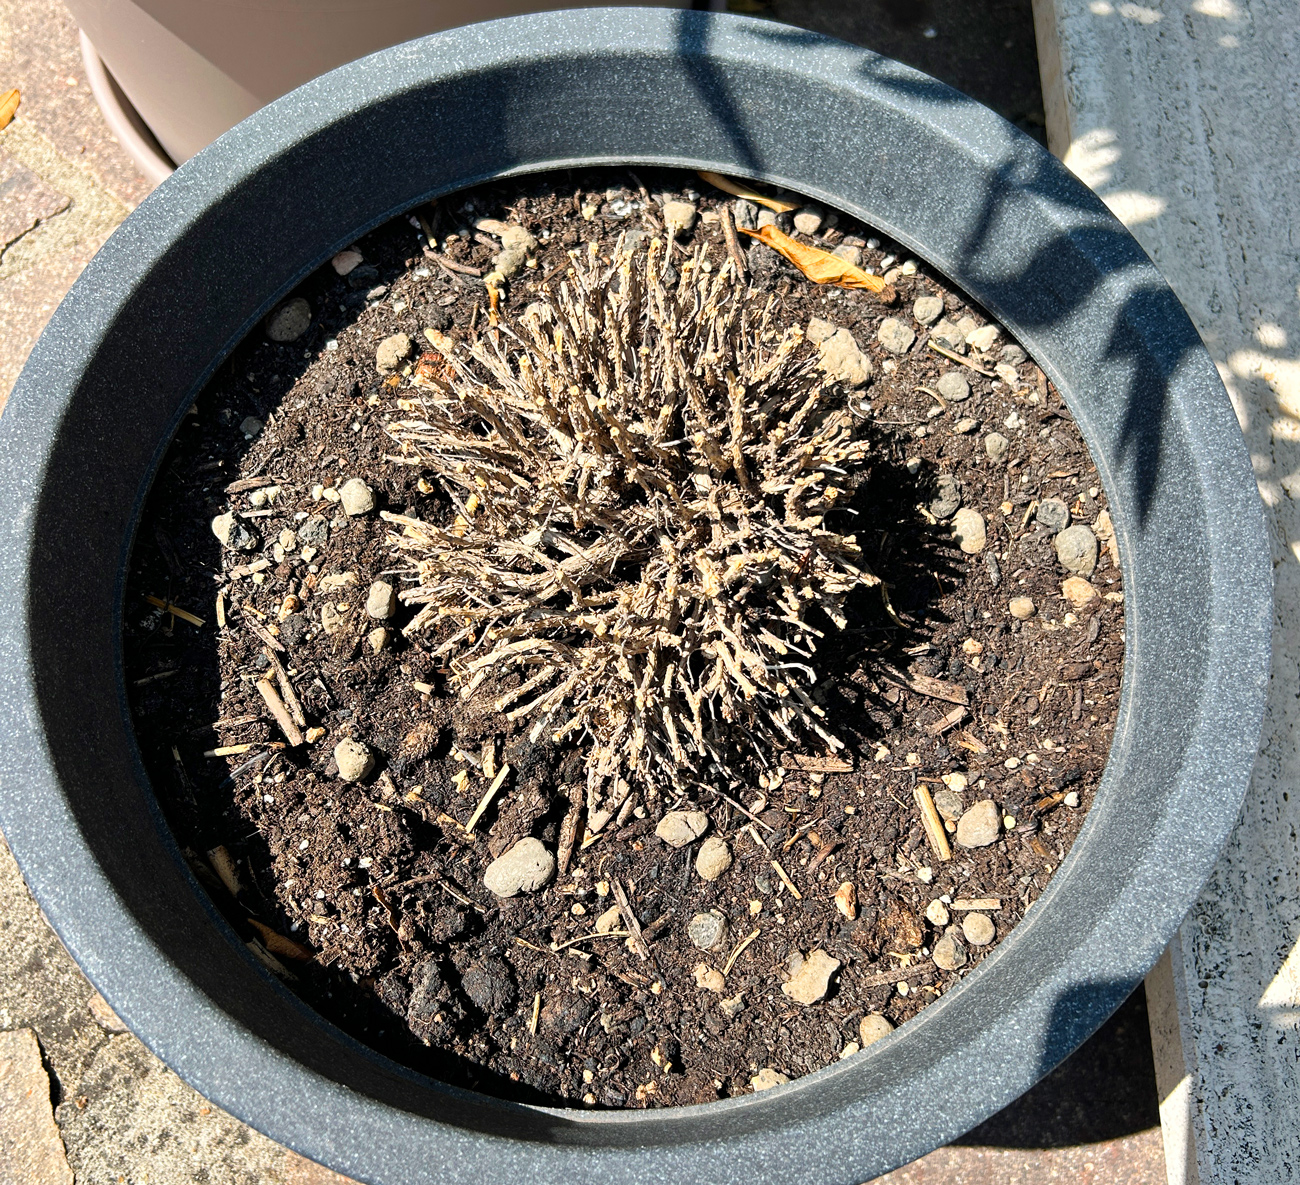
When I bought my Lemon Thyme plant, it was a dense, even mound — every stem was young and green, so a hard prune back then would have bounced back evenly all over. By the time I actually did the hard prune in early spring, a fair amount of that growth had turned woody at the base. I almost certainly cut some of those stems back too far into the old wood.
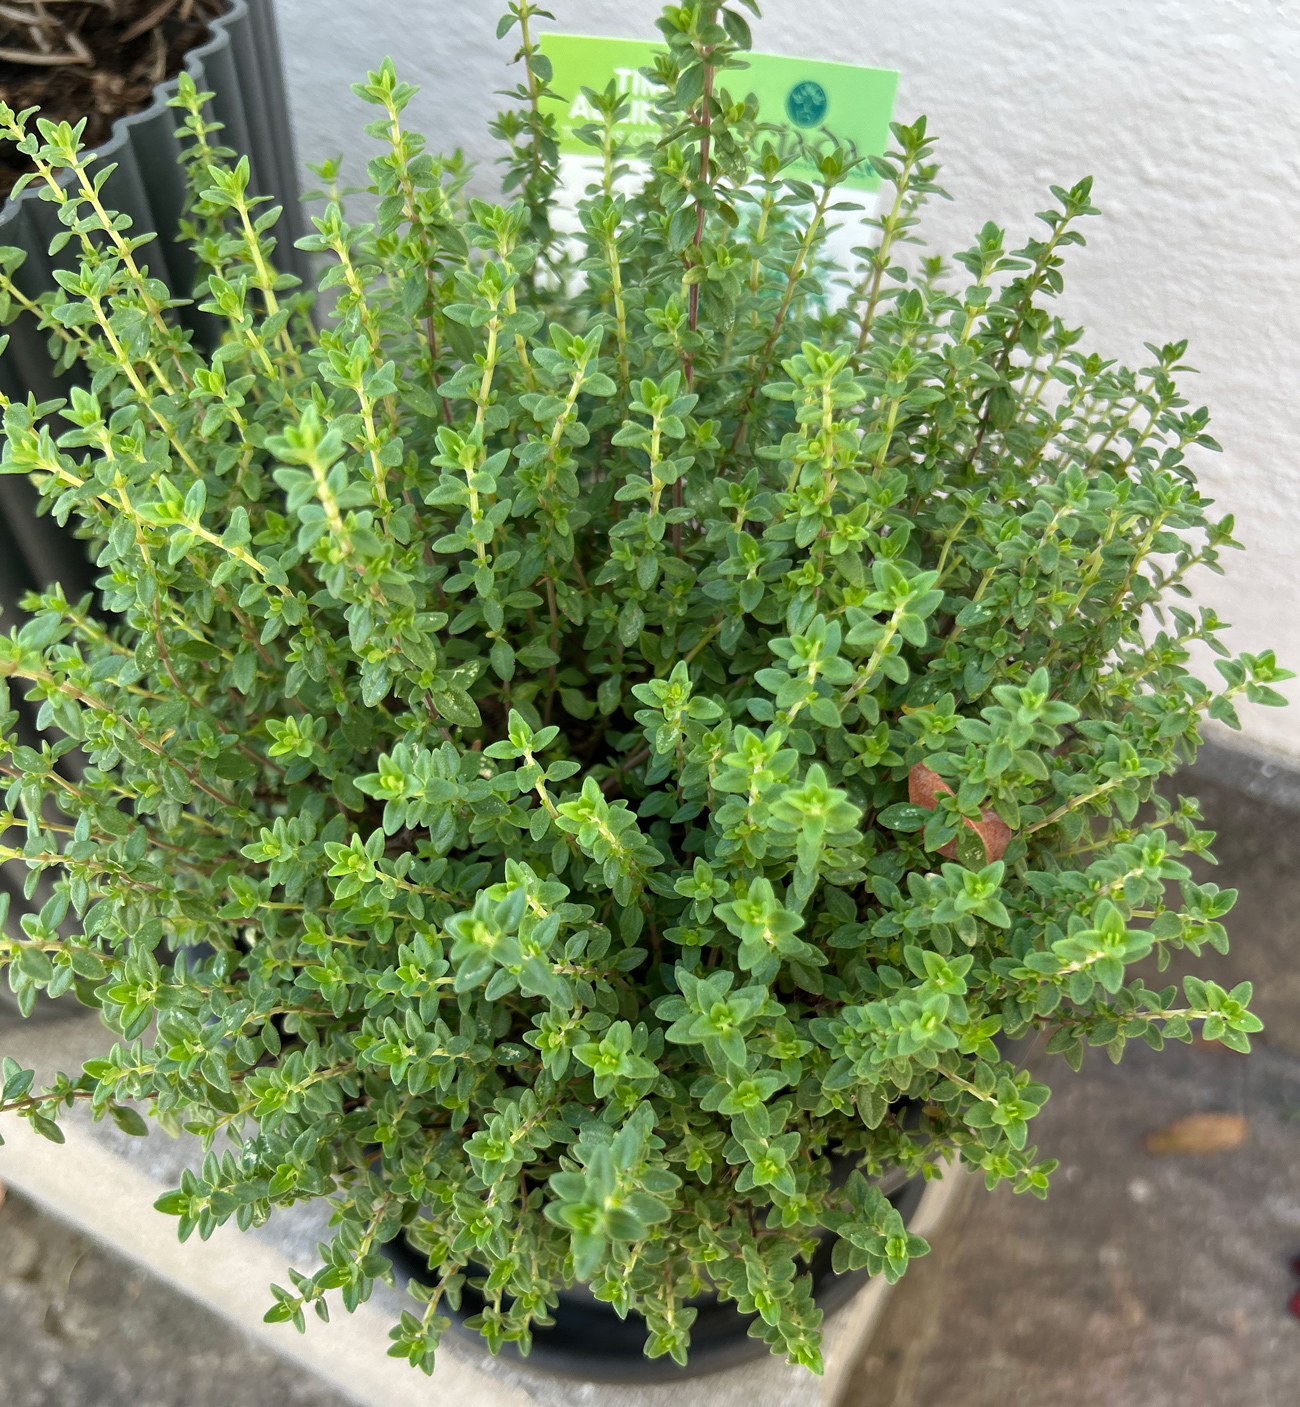
When I bought my Lemon Thyme plant, it was a dense, even mound — every stem was young and green, so a hard prune back then would have bounced back evenly all over. By the time I actually did the hard prune in early spring, a fair amount of that growth had turned woody at the base. I almost certainly cut some of those stems back too far into the old wood.
Where my plant actually stands right now
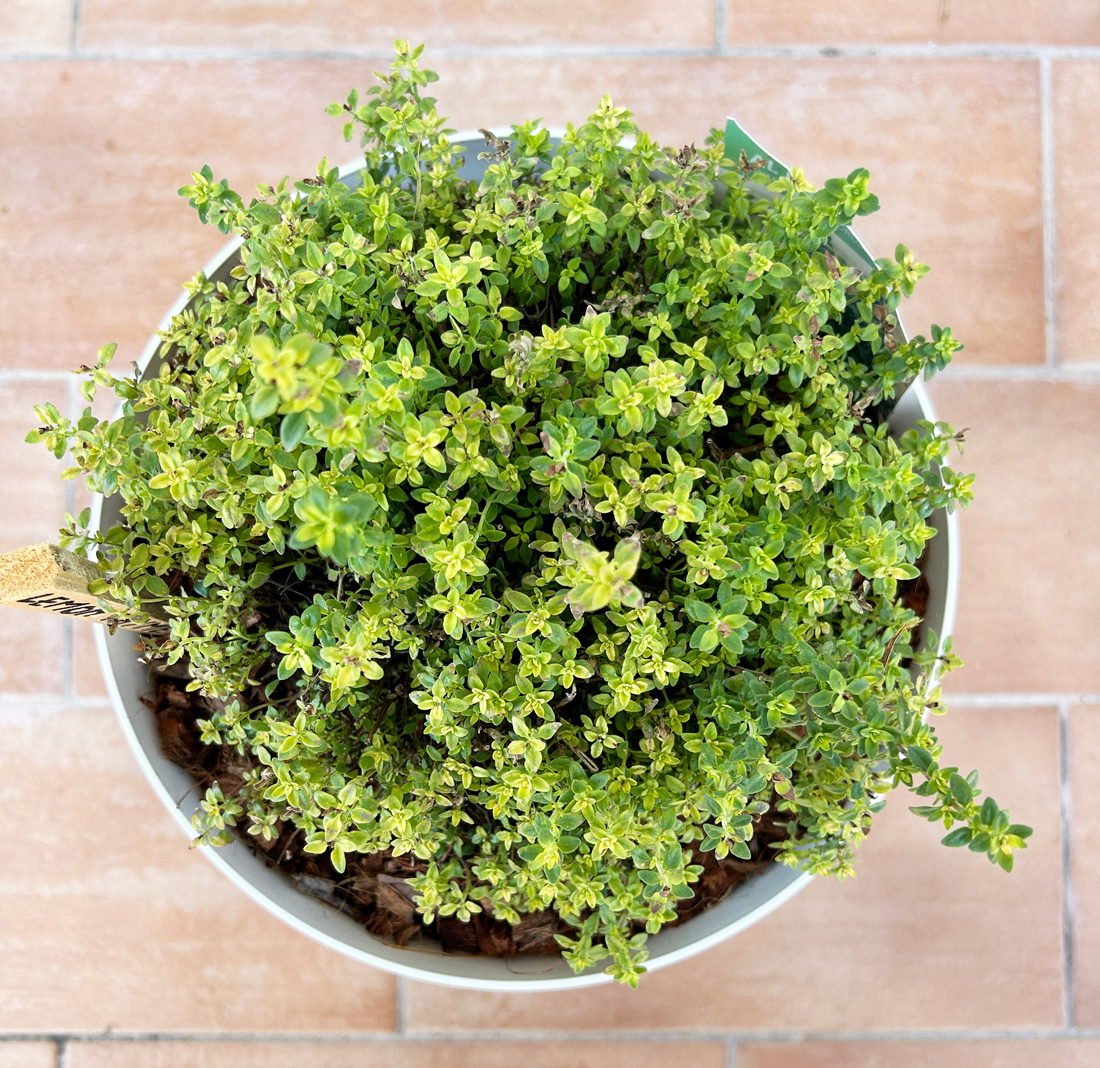
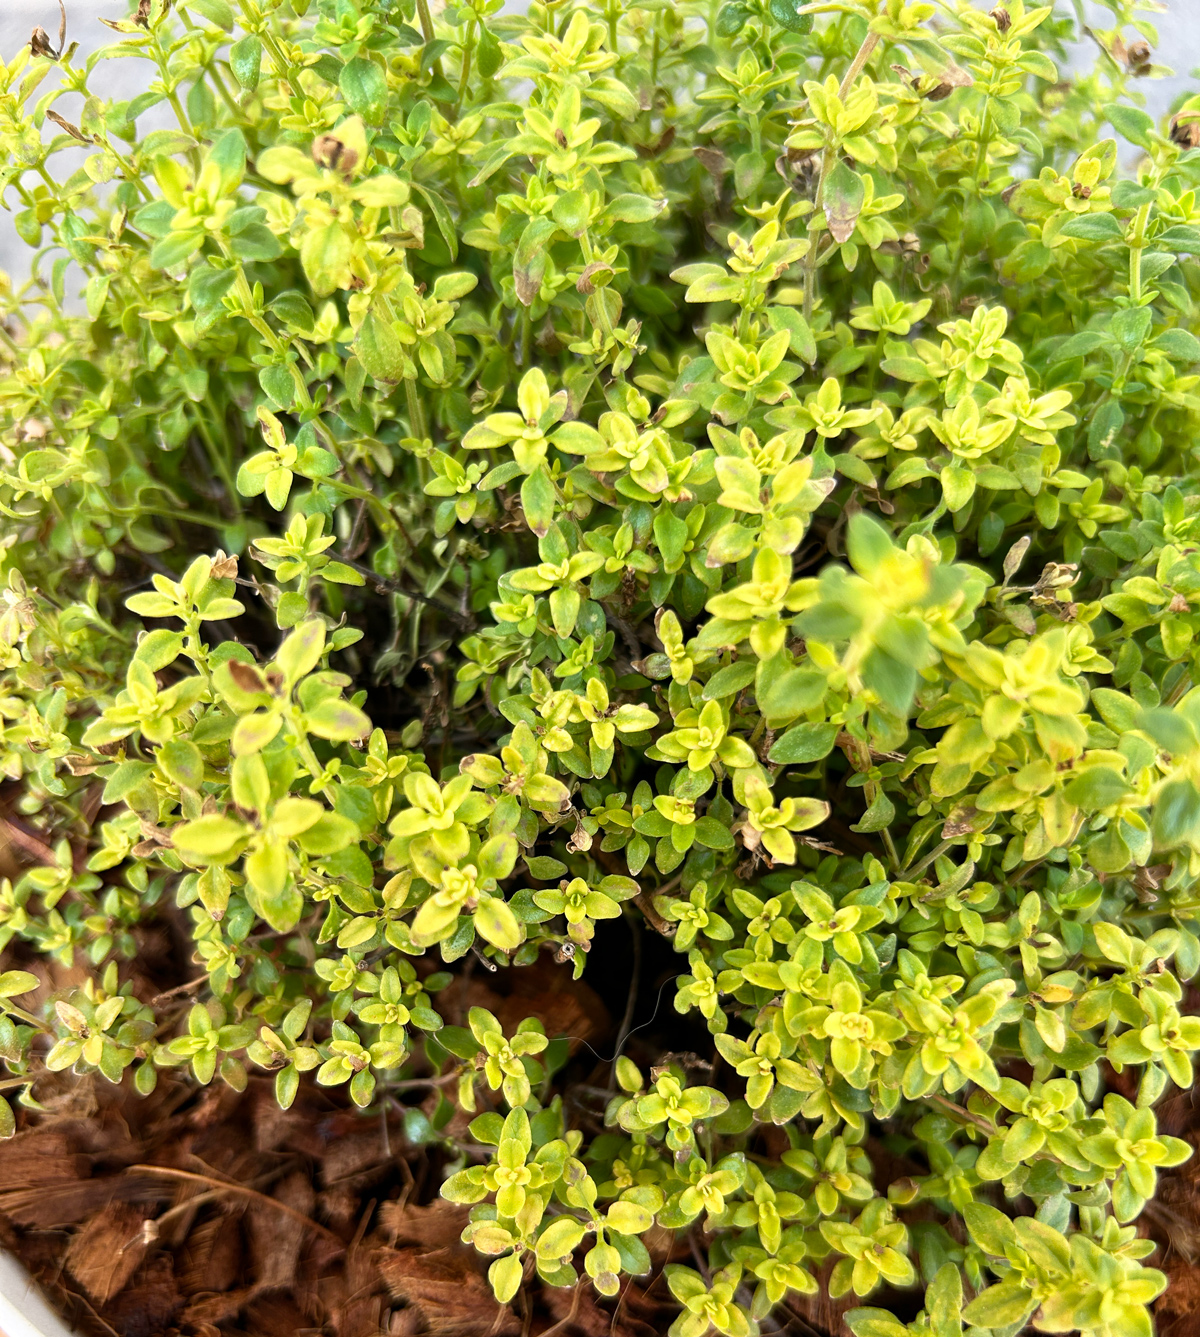
Between the prune going too deep in places, the roots maybe too wet, or even the coir mulch likely going hydrophobic on me, I think all these issues were compounding each other. I’ve started mixing in perlite and i have the intention to repot and mix with more sand soon; and I’m watching the water-and-checking-the-edges test before I water again. It’s not lavish yet, but here’s what it looks like now.
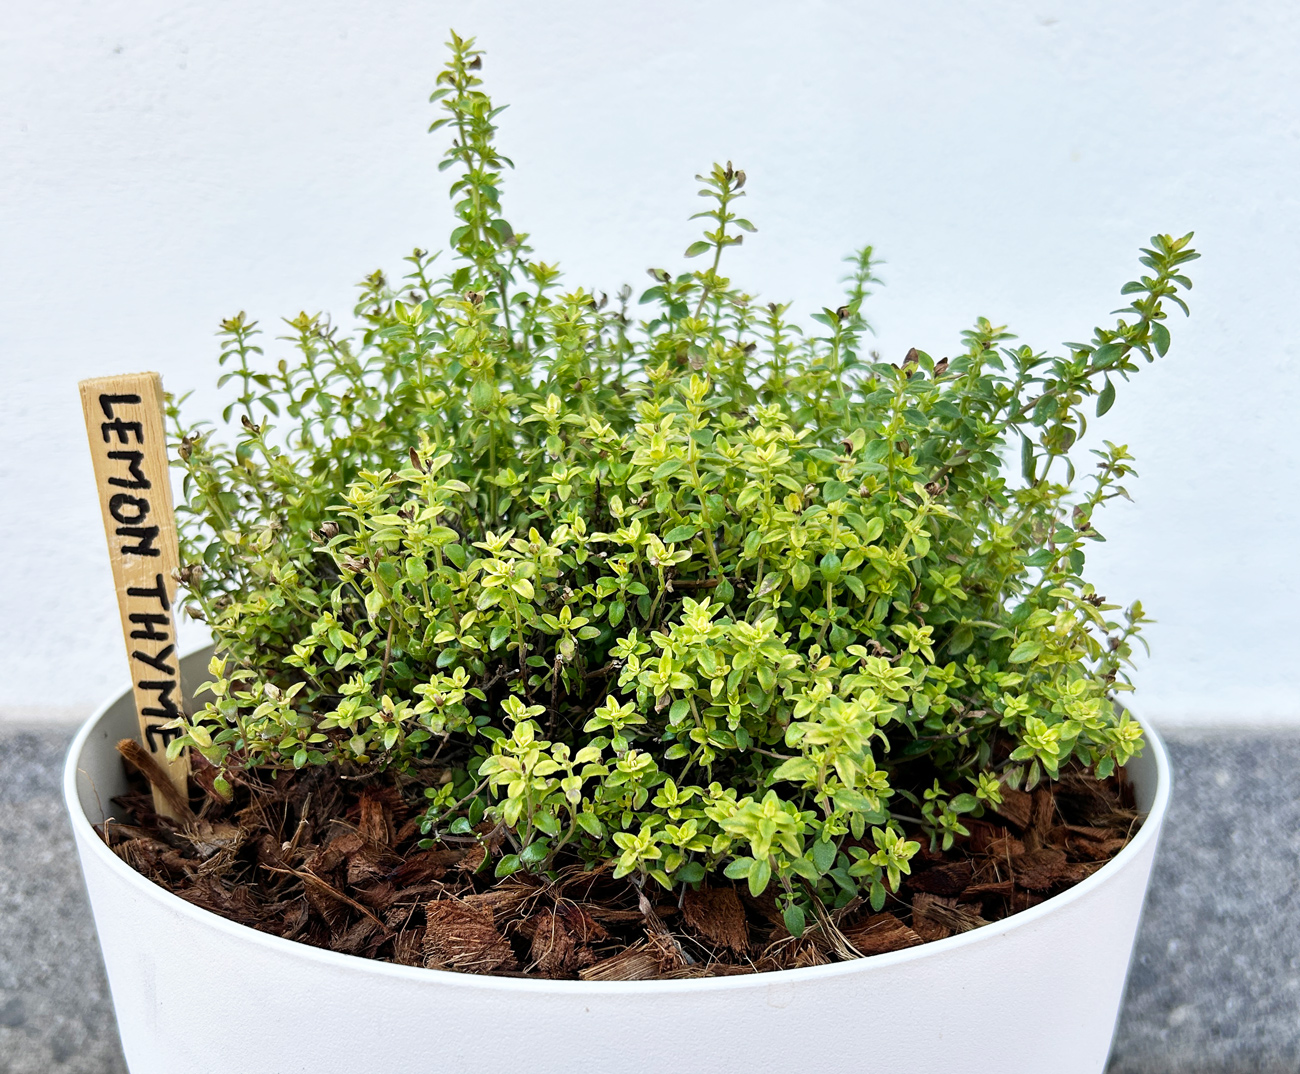
Reading the leaves: yellowing lower growth and drying top growth
Two more things I’ve noticed on mine: some of the leaves are yellowing, and a few of the newest, top leaves look like they’re drying out rather than filling in properly. Worth breaking down separately, because they can look like conflicting signals — but they’re probably not.
The yellowing: on thyme, this typically starts at the base and older growth and works its way up when the roots are struggling — most often because the soil’s staying too wet, which starves the roots of oxygen and makes it harder for them to take up nutrients even though the water’s right there. It can also be a straightforward nitrogen shortfall in a mix that’s been in the same pot a long time without feeding, but given everything else already pointing at drainage and root stress here, overwatering-related root stress is the more likely read on mine rather than a hungry plant.
The drying top leaves: this looks like the opposite problem — dry, crispy tips are the classic sign of underwatering — but it’s actually consistent with the same root issue, not a separate one. The newest growth sits at the very end of the plant’s water-delivery pathway, so it’s the first place damage shows when stressed roots can’t move water up efficiently, even if the soil itself still feels damp lower down. On top of that, the shoots that regrew after my hard prune are younger and less established than mature growth, so they’re naturally more sensitive to any inconsistency in watering while they’re still finding their feet.
Put together, yellowing at the base and crisping at the tips on the same plant is a recognised sign of roots under stress from moisture swings — not a nutrient problem, and not simple underwatering. It fits the hydrophobic-soil theory rather than contradicting it: some parts of the root ball likely staying too wet (yellowing) while the newest growth further out isn’t getting a reliable, consistent supply (drying tips).
So in the next days I will make sure the soil dries up, I will repot mixing some extra sand and may also pot into terracotta pot, if I still have one.
Propagating lemon thyme
If you want more plants — or a backup, given mine’s proof that hard pruning is a bit of a gamble — there are three straightforward ways:
Cuttings: in summer, before flowering, take a shoot about 15 cm long that’s gone slightly woody at the base. Strip the lower leaves, leaving just the top 2–3 sets, and either pop it in a jar of water or straight into free-draining compost, covered loosely with a plastic bag to keep humidity up. Expect roots in four to six weeks — new leaf growth is your sign it’s worked.
Division: once a plant’s a few years established, dig up the whole root ball in spring or autumn, gently shake off the excess soil, and split it into three or four sections by hand. Replant each piece as its own plant.
Layering: the laziest and most natural method — bend a long, low stem down and cover part of it with soil, leaving both ends exposed. It’ll typically root on its own within a couple of weeks, at which point you can cut it free from the parent plant.
Harvesting and using it in the kitchen
Lemon thyme is at its most fragrant and flavourful just before it flowers, and picked in the morning once the dew’s gone but before the sun’s got strong. Snip sprigs regularly through the season — it encourages bushier growth, on top of giving you a steady supply.
It’s genuinely versatile: the citrus note works well with chicken and fish, roasted vegetables, salad dressings alongside olive oil and garlic, herb butters, and even sweeter bakes like shortbread or scones. Leaves are best chopped fresh and added right at the end of cooking so the flavour doesn’t cook off. To store for later, bundle 5–6 stems and hang them upside down somewhere dark, dry and well-ventilated for 7–10 days, then strip the dried leaves into an airtight container.
Common pests and problems
Thyme in general is fairly trouble-free once established. The RHS specifically flags rosemary beetle (which despite the name also targets thyme, along with lavender and sage) and sage/Ligurian leafhoppers (which cause a coarse, pale mottling on the leaves) as the main named pests to watch for outdoors, plus slugs and snails nibbling soft new shoots. Neither tends to cause serious damage, so control usually isn’t necessary unless it’s a heavy infestation.
For pot-grown plants, especially indoors or somewhere with poor air circulation, you may also see spider mites, aphids, or powdery mildew — insecticidal soap or neem oil handles most pest issues, and better airflow plus free-draining soil goes a long way toward preventing mildew in the first place. I tend to use neem oil spray to keep pests away.
Is lemon thyme safe around pets?
Fresh lemon thyme is generally considered non-toxic to cats and dogs, and thyme in general shows up on several “safe herb” lists for pets.
That said, some sources flag caution around concentrated or essential-oil forms of citrus-scented plants specifically, so if your cat or dog is a determined nibbler, it’s worth keeping an eye on them around it and checking with your vet if you’re ever unsure — this isn’t medical advice, just a starting point for your own judgement call.
Common mistakes worth flagging
- Cutting a hard prune too far into old, woody stems instead of stopping just above visible green growth.
- Treating lemon thyme like a thirsty herb (mint, basil) instead of a dry-loving Mediterranean one.
- Assuming a plastic pot and a terracotta pot behave the same way for moisture — they don’t.
- Not noticing when a coir-heavy mix has gone hydrophobic, and continuing to top-water without it ever reaching the roots.
- Using play or beach sand to improve drainage instead of coarse horticultural sand — it compacts and can do more harm than good.
How’s your lemon thyme doing?
If yours isn’t bouncing back the way you’d hoped either, I’d like to know what you’re seeing — drop a comment, or share a photo in the Amazing Herb Garden Community on Facebook.
Between us we’ll probably get to the bottom of it faster than I will on my own.
Leave a Reply
Want to join the discussion?Feel free to contribute!